How to Convert MP4 to Text (Upload Direct, No Extraction Needed)
Summarize this article with:
The Quick Answer
You do not need to extract audio from your MP4 before transcribing it. Upload the file directly to any serious transcription tool and the server pulls the audio out automatically using ffmpeg. The only things worth checking first: does the file actually have an audio track, and if it has more than one, which track do you want?
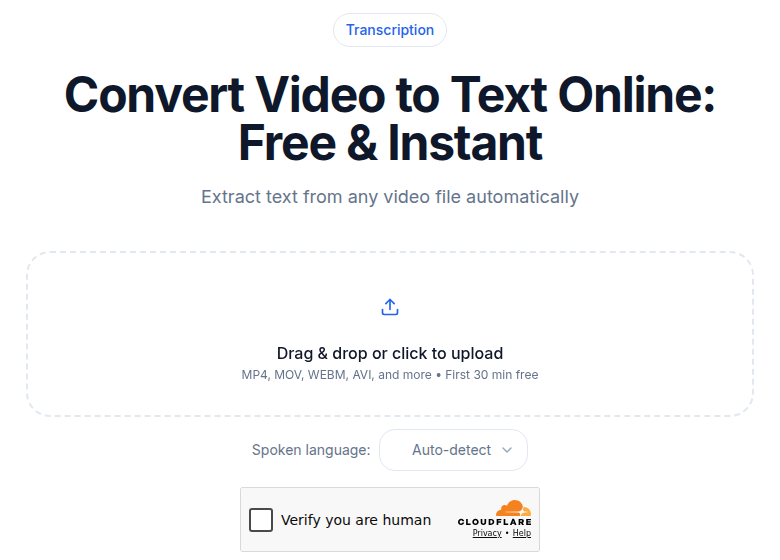 MP4 video uploads: the audio track is extracted automatically
What Is Actually Inside an MP4
MP4 is a container, not a codec. The video you recorded last week is probably H.264 or HEVC (H.265) for the picture, and AAC for the audio. The container just holds them together with timing metadata, subtitle tracks, and chapter markers.
This distinction matters for transcription because the speech recognition model sees only the audio stream, not the video. The tool demuxes the container, extracts the audio, resamples to 16 kHz mono (the format Whisper-class models expect), and runs inference. None of that depends on which video codec is inside.
What does matter:
- AAC (most common): extracts cleanly in every transcription tool.
- AC-3 / Dolby: found in MP4s ripped from broadcast or Blu-ray. Some tools handle it; some need you to transcode to AAC first.
- Opus inside MP4: less common, increasingly used by web-captured recordings. Well-supported in modern tools, occasionally trips up older pipelines.
The video codec (H.264 vs H.265) is irrelevant to transcription accuracy.
The Multi-Audio-Track Problem
This is the most common silent failure in MP4 transcription. An MP4 file can legally carry multiple audio streams in a single container, and most transcription tools default to stream index 0 without telling you.
Where you encounter this:
- Dubbed content: a film or documentary MP4 may have English commentary on track 0 and the original language on track 1, or vice versa, depending on how it was packaged.
- OBS screen recordings: OBS in Advanced Output mode can record game audio on track 1 and a microphone on track 2, both embedded in the same MP4. Transcribing such a file with default settings gives you one mixed track, not necessarily the one with speech.
- Multi-language conference exports: some webinar platforms embed an interpreter track as track 2. Auto-detect on a file that opens with English but contains French in track 2 will produce a mess.
- Commentary recordings: podcast setups that record a raw mix plus a per-speaker stem in separate embedded tracks.
To see what you are dealing with before uploading, run ffprobe locally:
ffprobe -i video.mp4 -show_streams -select_streams a -v quiet
That lists every audio stream, its codec, language tag, and channel layout. If you see two or more streams, decide which one you want and either specify it on upload (if the tool supports track selection), or extract just that stream first:
ffmpeg -i video.mp4 -map 0:a:1 -c copy track2.m4a
(Replace 0:a:1 with the index of the stream you want, zero-indexed.)
Screen Recordings vs Camera Footage: Different Quality Profiles
Both produce MP4 files but they behave very differently for transcription.
Camera footage (phone, mirrorless, camcorder): audio is captured by a physical microphone in a physical space. Quality degrades with distance. An interview shot at 30 cm from a phone's mic transcribes at 96-98% accuracy. A panel discussion filmed from 10 meters away with the room mic drops to 85-90%, sometimes lower if there is significant echo or HVAC noise.
Screen recordings (OBS, Loom, ScreenFlow, Camtasia, Windows Game Bar, macOS Screenshot): the audio source is usually a USB or headset mic sitting a few centimeters from the speaker's mouth. This is nearly ideal for transcription. Signal-to-noise is high, no room reverb, consistent bitrate (usually 128-320 kbps AAC). The challenge is not audio quality; it is vocabulary. Screen recordings tend to contain command-line syntax, library names, error messages, keyboard shortcuts, and product names that speech recognition models have not seen frequently. Expect occasional errors on technical terms even when accuracy on conversational words is above 97%.
One structural difference: screen recordings often produce a single mono or stereo track with no variation across the file's runtime. Camera footage sometimes changes quality mid-file (speaker walks away from mic, crowd noise spikes). For the camera case, a clean edit before uploading beats a longer post-edit on the transcript.
File Sizes and What to Do When Your MP4 Is Too Large
| Source | Resolution / FPS | Approximate size per minute |
|---|---|---|
| iPhone 16 (HEVC H.265) | 4K 30fps | ~350 MB/min |
| iPhone 16 (HEVC H.265) | 1080p 30fps | ~60 MB/min |
| Zoom cloud recording | 1080p (H.264, AAC 128 kbps) | ~70-120 MB/min |
| OBS screen recording | 1080p 60fps (H.264) | ~150-400 MB/min (bitrate-dependent) |
| Android phone (H.264) | 1080p 30fps | ~100-200 MB/min |
| Exported webinar (compressed) | 720p H.264 | ~20-50 MB/min |
Most transcription tools accept files up to 500 MB to 2 GB. A 1-hour Zoom meeting (~4.2-7.2 GB) may exceed that.
Your options, in order of effort:
-
Upload to a tool that accepts large files via URL. If your MP4 is accessible at a URL (a YouTube video, a Loom share link, a Zoom cloud recording link), skip the download entirely. ConvertAudioToText's video-to-text tool accepts direct URLs for this reason.
-
Extract audio only before uploading. A 1-hour 1080p MP4 may be 4 GB; the AAC audio extracted from it is around 55-70 MB. No quality is lost for transcription purposes because you are discarding the video signal, not the audio. The ffmpeg command is lossless copy of the audio stream:
ffmpeg -i recording.mp4 -vn -c:a copy audio.m4a -
Split at a natural break. If you need word-level timestamps that span the full recording, splitting and re-stitching timestamps manually is tedious. Extraction is easier.
The HEVC Gotcha
Apple devices have recorded in HEVC (H.265) by default since 2017. HEVC containers are still labeled .mp4, so the filename tells you nothing. Most current transcription tools handle HEVC fine because they pass the container through ffmpeg, which has robust HEVC support. But a few legacy tools or browser-based uploaders try to read the video client-side before sending it, and older browsers cannot decode H.265. If you get a "format not supported" error on a file that is definitely MP4, the video codec is the likely culprit.
Fix: extract audio first (above command), which produces a pure AAC file that any tool accepts. Or re-encode video to H.264:
ffmpeg -i hevc_video.mp4 -c:v libx264 -c:a copy h264_video.mp4
This is slower and makes a larger file; prefer the audio-only extraction if you only need the transcript.
Where These Files Come From (and What to Watch For)
Zoom Cloud Recordings
Zoom encodes cloud recordings as H.264 video with AAC audio at approximately 64-128 kbps mono. The audio is bandlimited and compressed to minimize storage, which means it strips out frequencies outside the speech range. That is actually good for transcription: high frequencies that cause noise are gone, and the model gets a clean voice signal. Accuracy on Zoom meetings with one or two speakers is typically 95-97% on clear English, lower on heavy accents or fast speech.
For a Zoom-specific workflow without downloading the MP4 first, the guide to transcribing Zoom meetings walks through platform-level access.
iPhone and Android Videos
iPhones record to MOV containers (H.264 or HEVC, AAC audio) and can share as MP4 with the same content inside. Android devices record MP4 directly. Either uploads and transcribes without intervention. The file size caveat is real: a 10-minute iPhone 4K 30fps clip is roughly 3.5 GB. Extract audio before uploading.
Screen Recordings from OBS
OBS users in Advanced Output mode sometimes have 6 audio tracks embedded in one MP4. Track 1 is usually the full mix; subsequent tracks are per-source stems. If your transcript is in a language you did not expect, or is transcribing game audio instead of your voiceover, you are on the wrong track. Use ffprobe to see what is there, then extract the specific track.
For adding subtitles back to the recorded footage after transcribing, the subtitle generator tool produces SRT and VTT files you can re-import into OBS or any video editor.
YouTube Downloads
If you downloaded a YouTube video using yt-dlp or a similar tool, the resulting MP4 carries audio at the quality YouTube served it, typically 128 kbps AAC for standard and 256 kbps for Premium-eligible content. Both are sufficient for transcription. The YouTube transcript generator tool skips the download step entirely by reading the URL directly.
Conference and Event Recordings
Multi-camera conference exports often have audio sourced from the room PA, not from a lavalier on the speaker. Expect 85-92% accuracy if the room is large or has audience noise. If the file came from a vendor who mixed separate mic feeds before export, accuracy is higher. Check the audio in VLC or any player before uploading: if it sounds muddy to your ear, the model will struggle too.
What Happens on the Server Side
You upload the MP4. The transcription backend runs something equivalent to:
- Inspect the container, identify all audio streams.
- Extract stream 0 (or the user-specified stream) to a temporary audio file. This is a lossless copy operation:
ffmpeg -i input.mp4 -map 0:a:0 -vn -c:a copy temp.m4a. - Resample to 16 kHz mono PCM, the format expected by Whisper-class and Deepgram-class models.
- Chunk into 30-second windows with 5-second overlaps for boundary accuracy.
- Run inference and stitch the word-level timestamps back together.
- Apply punctuation restoration, speaker diarization (if enabled), and post-processing.
- Delete the temporary file.
The step that costs the most wall-clock time on a large file is step 3 (resampling), especially for 4K HEVC files where the container read is slow. A pre-extracted audio file skips steps 1-2 entirely.
If the MP4 has a variable-frame-rate video track (common in screen recordings from certain apps), the audio timestamps remain correct after extraction because you are not re-encoding anything: -c:a copy preserves exact timing from the audio stream's timestamps independent of the video track.
How to Upload: The Short Version
- Open the transcription tool and drag your MP4 in, or paste a URL if the file is hosted.
- Check: if the file has multiple audio tracks and you are not sure which one has the speech, extract the right one first using ffprobe and ffmpeg.
- Select the spoken language manually. Auto-detect works, but manual selection adds 2-5 accuracy points on accented or multilingual content.
- Submit. A 30-minute 1080p Zoom recording typically returns in 3-6 minutes.
- Review for proper nouns, technical terms, and any cross-talk segments where speakers overlapped.
- Export as TXT, DOCX, SRT, or VTT depending on whether you need the content for reading, editing, or captioning.
If you just need a transcript without setting up an account, ConvertAudioToText transcribes the first 30 minutes of an MP4 with no account, and a free account runs your first file on the premium engine (up to an hour), then keeps transcribing free (up to 30 files a day, up to 30 minutes each), no credit card required.
Frequently Asked Questions
Do I need to extract audio from an MP4 before transcribing?
No. Upload the MP4 directly. Transcription services extract the audio server-side using ffmpeg or an equivalent library. Manual extraction is only useful if your file exceeds the service's size limit, in which case extracting audio reduces the file to a fraction of its original size without any quality loss.
My MP4 transcript came out in the wrong language. What happened?
Two likely causes. First, auto-detect failed on a file with a short or accented intro: set the language manually. Second, and more common than people expect, your MP4 has multiple audio streams and the tool transcribed stream 0, which is a different language than the one you wanted. Run ffprobe -i video.mp4 -show_streams -select_streams a to list all audio streams and their language tags, then extract the correct one.
Why can't I upload my iPhone 4K video? It says the file is too large.
iPhone 4K 30fps records at roughly 350 MB per minute in HEVC. A 10-minute clip is around 3.5 GB, which exceeds most upload limits. Run ffmpeg -i input.mp4 -vn -c:a copy audio.m4a to extract just the audio, which will be around 10-15 MB for the same 10 minutes. Upload the audio file instead.
Does HEVC (H.265) video inside an MP4 affect transcription quality?
No. The video codec is discarded during audio extraction. HEVC vs H.264 makes no difference to transcription accuracy. The only practical issue is that some browser-based uploaders try to decode the video client-side before upload, and older browsers cannot decode H.265. If you hit a "format not supported" error, extract audio first or re-encode video to H.264.
My OBS recording has separate game and mic audio tracks. Will the tool transcribe both?
Most tools transcribe only stream 0, which in a typical OBS multi-track setup is the full mixed audio. If you want only the mic track (usually stream 1 in OBS's default config), extract it before uploading: ffmpeg -i recording.mp4 -map 0:a:1 -c copy mic.m4a. Transcribing the mic-only track improves speaker diarization accuracy if other audio sources were bleeding into the mix.
Sources
- Zoom recording formats documentation: https://support.zoom.com/hc/en/article?id=zm_kb&sysparm_article=KB0064394
- Descript pricing: https://www.descript.com/pricing
- Rev pricing: https://www.rev.com/pricing
- TurboScribe pricing: https://turboscribe.ai/pricing (listed via search result)
- Happy Scribe pricing: https://www.happyscribe.com/pricing
- Otter.ai pricing: https://otter.ai/pricing (referenced via multiple review aggregators)
- ffprobe documentation: https://ffmpeg.org/ffprobe.html
- OBS multi-track audio recording guide: https://obsproject.com/kb/multiple-audio-track-recording-guide
Try transcription free
Convert any audio or video to clean, unwatermarked text — speaker labels, timestamps, and AI summaries included. First 30 minutes free, no account.
Related Articles

How to Convert AVI to Text: Transcribe Legacy Video Files
Learn how to convert AVI to text, including codec-specific gotchas for DivX, XviD, and VBR MP3 audio, plus when to re-encode first vs upload directly.

How to Convert FLV to Text: Transcribe Flash Era Archives (2026)
Step-by-step guide to converting FLV Flash Video files to accurate text transcripts. Covers codecs, ffmpeg repair, when to remux to MP4, and tool compatibility realities.