
Repurpose Zoom Recordings into Blog Posts (2026 Workflow)
Summarize this article with:
You can turn a 45-minute Zoom call into a 1,500-word blog post in under 90 minutes. The workflow is: confirm you have permission to publish (not just to record), transcribe with speaker labels, skim for the one strong angle, and write prose around two or three direct quotes. The result has named experts, original substance, and a level of specificity that desk-research articles cannot match.
You can turn one 45-minute Zoom call into a publishable 1,500-word article in under 90 minutes. The steps are consistent: confirm you have permission to publish the content, get a clean transcript with speaker labels, skim for the one real insight worth writing about, and build prose around the quotes rather than summarizing everything equally.
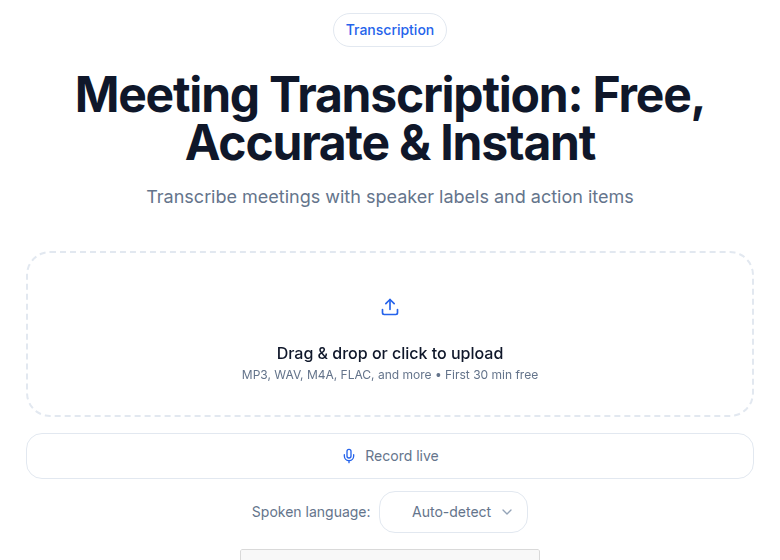 The Zoom recording uploads directly; the transcript is the article draft
If you are on three Zoom calls a week, you are already generating 90-plus hours of original conversation per year. Customer interviews, webinars, expert AMAs, partner calls, most teams treat these as ephemeral. The teams that treat them as raw material publish articles their competitors cannot easily replicate, because the source material cannot be desk-researched. It was lived.
Before You Publish: Get Permission to Quote
Zoom's in-meeting consent notification, the "OK or Leave Meeting" prompt, covers recording, not publication. These are two separate thresholds.
The recording prompt means participants knew the session was captured. Publishing someone's name and quoted words in a public article requires a separate step: their explicit permission. A brief written sign-off works well. Something as simple as an email reply saying "yes, you can quote me from our conversation on [date]" is enough for most purposes.
For internal meetings where everyone is on your team, the bar is lower: the test is whether any participant would be surprised or harmed by seeing their words published. If not, a note in the meeting invitation that content may be repurposed is usually sufficient.
For webinars with external guests, always ask. Public-facing content with named external participants without their written consent creates reputational and legal exposure. The good news is that most experts and guests will say yes, especially if you send them the draft before publishing.
A note on geography: recording-consent laws vary. Most US states follow one-party consent rules; a smaller number require all-party consent; when participants are in different states (or countries), the strictest applicable law governs. If your meetings regularly include international participants, a short consent sentence in your webinar registration flow handles this cleanly.
For more on getting recordings right before you ever need to transcribe them, see the Zoom transcription guide.
What Makes Zoom Source Material Worth Publishing
Zoom calls have three properties a blank document does not.
They are unscripted. The questions your guest asks, the examples they reach for, the tangents they take, these surface ideas you would not have written on your own. A post drafted from a transcript inherits that freshness.
They are multi-voice. A solo blog post is one perspective. A transcript-derived post can quote two or three real humans with named expertise. That is a genuine E-E-A-T signal that adds weight to what you publish.
They already exist. Producing source material is the slowest part of content creation. Publishing what you have already recorded skips that step entirely. The friction is editing, not creating.
Step 1: Get the Right File Out of Zoom
Zoom cloud recordings produce both an MP4 and a separate M4A audio file. The M4A is smaller and works identically for transcription purposes, use it. You can download it directly from your Zoom recordings page under the cloud recordings tab.
For local recordings, the situation is different: you get a combined MP4 by default. A separate audio-only file is produced only if you enabled the audio-only recording setting in Zoom's settings before the meeting started. If you did not, use the MP4, transcription tools handle video files just fine.
One practical note: if your call had audio issues (echo, dropout, crosstalk), the separate audio track will carry those problems forward. The video file sometimes masks them less obviously. Try the audio track first; if the transcript is error-prone, use the MP4 instead.
Step 2: Transcribe with Speaker Labels
A blog post needs to know who said what. Generic "Speaker 1" and "Speaker 2" labels slow the editing process considerably. Use a transcription tool that produces speaker diarization, then rename the labels with real names before you start editing. That one step cuts the post-production time in half.
Upload the file at audio-to-text, let it run, and download the transcript as plain text. A 45-minute Zoom recording transcribes in under five minutes with modern AI tools. The output should have timestamps and speaker labels.
For more on choosing the right tool for meeting recordings specifically, see meeting transcription options.
Step 3: Skim for the Story, Not the Summary
Open the transcript and read it once at full speed. Do not edit yet. You are looking for the two or three moments where the conversation said something interesting, contradictory, or specific. These are your post.
A typical 45-minute call contains:
- One or two genuinely insightful exchanges that justify an article
- Several quotable lines that work as pull-quotes or section headings
- A handful of supporting points that frame the central insight
- A lot of pleasantries, scheduling talk, and tangents you will cut
Mark the keepers. Everything else falls away. You are not summarizing a meeting; you are mining it.
Step 4: Pick an Angle, Not a Summary
The most common mistake is publishing the transcript as a recap. Recaps are boring. Posts that perform pick one specific angle and use the transcript as primary source material.
If your call ranged across pricing, hiring, and product strategy, a summary covers all three blandly. A blog post picks the sharpest or most contrarian moment, "Why Maya stopped using job boards entirely and what replaced them", and uses the rest of the transcript as supporting context. One strong angle beats three weak ones every time.
The interview-to-article workflow goes deeper on picking angles when multiple speakers are contradicting each other, which is often where the best posts come from.
Step 5: Clean the Meeting-Speak
Spoken conversation does not translate directly to readable prose. Before you do any structural editing, do a light clean of the raw quotes you plan to use:
- "Um, you know, I think what we found was that, like, customers don't really..." becomes "We found that customers don't..."
- "So I guess what I'm saying is..." becomes the actual point that follows.
- Repeated false starts disappear.
You are not changing meaning; you are removing speech artifacts. If a quote becomes unrecognizable when cleaned, it was not a good quote. Find a different one.
For webinars specifically, watch for phrases that made sense in context but read oddly out of it: "as I mentioned on the slide," "you can see here," or references to chat questions. Strip these or replace them with the actual content they referred to.
Step 6: Write Around the Quotes, Not Through Them
Most transcript-based drafts read like edited dialogue. That is not a blog post; it is a Q&A. The fix is to write your own narrative paragraphs around two or three direct quotes per section. The quotes carry the authority. Your prose carries the argument.
Use this structure for each section:
- One or two paragraphs of your own writing that frame the point you are about to make.
- A direct quote from the transcript, attributed to the speaker with their full name and title on first mention.
- A short paragraph that interprets or extends the quote, what does this mean for the reader?
This is the structure used by every magazine feature you have read. It works because the reader experiences both your voice and a verifiable second voice. And it scales: two or three sections built this way produce a 1,200 to 1,500-word post that reads like original writing, not a transcript dump.
Step 7: Add Context the Recording Cannot
The transcript captures what was said. It does not capture what a reader needs who was not on the call. Add a paragraph at the top that establishes who is being quoted, why their perspective matters, and what the conversation was originally about. This background is the layer that turns a transcript excerpt into a publishable article.
If the conversation referenced specific data, tools, or events, link them out. The bar for credibility is higher than it was a few years ago, and external references are cheap. Internal links to related posts on your own site also signal topical depth.
See content repurposing from audio for how this principle applies across podcast episodes, voice memos, and recorded interviews beyond Zoom.
Step 8: Extract the Headline from the Transcript Itself
The best titles usually come straight from the transcript. Scan for lines a guest said in passing that work as a headline claim. "We stopped doing customer interviews when we hit 200 users and our retention went up" is a better post title than "How We Improved Retention." Let the speaker write your headline. Just credit them in the body.
How Long This Actually Takes
| Step | Time |
|---|---|
| Download Zoom recording | 2 minutes |
| Transcribe with speaker labels | Under 5 minutes (automated) |
| Skim and mark keepers | 10-15 minutes |
| Clean quotes, pick angle, outline | 15 minutes |
| Write 1,200-1,500 words | 25-35 minutes |
| Add context, links, pull quotes | 10-15 minutes |
| Total | 67-87 minutes |
That is one short work block. The post that comes out the other side has named experts quoted, original substance that cannot be replicated from desk research, and a source file you can link as proof. For teams that record calls as standard practice, this is the highest-leverage content workflow available.
The bottleneck is not capability. It is the habit of treating recordings as throwaway material. Once you start treating them as first drafts, your archive becomes the most underused asset you have.
If you just need a clean transcript to start from, without connecting a meeting bot or adding integrations, ConvertAudioToText lets you upload the Zoom file directly and get a diarized transcript in minutes.
Common Questions
Do I need permission from Zoom participants before publishing their quotes?
Yes. Zoom's in-meeting consent notification, the "OK or Leave Meeting" prompt, covers recording, not publication. If you plan to quote someone in a public article, you need their explicit permission, a written sign-off is cleanest. For internal meetings where no external guests appear, the bar is lower, but you should still tell anyone you intend to quote.
How long does it take to transcribe a 45-minute Zoom recording?
With an AI transcription tool, under five minutes in most cases. The main time cost is editing: skimming for the story, picking an angle, and writing the surrounding prose. Budget 60 to 90 minutes total for a complete draft.
What file format should I download from Zoom for transcription?
Cloud recordings give you both an MP4 and a separate M4A audio file. The M4A is smaller and works identically for transcription. For local recordings, you get a combined MP4 by default; a separate audio file requires enabling the audio-only setting in Zoom before the meeting starts.
How do I make a transcript-based post feel like an article, not a Q&A?
Write your own narrative paragraphs around two or three direct quotes per section. The quotes carry authority; your prose carries the argument. Structure each section as: context you write, one quote, then your interpretation. That pattern is what separates a feature article from an edited transcript.
Sources
Try transcription free
Convert any audio or video to clean, unwatermarked text — speaker labels, timestamps, and AI summaries included. First 30 minutes free, no account.
Related Articles

Agentic Transcription Systems: Real Patterns for 2026
Agentic transcription goes beyond raw text. Learn the three real agent loops (verify-and-retry, terminology lookup, summary chains) that work in production today.

Batch Transcription for Large Projects: The 2026 Playbook
How to run a 1,000-file batch transcription job without losing your mind: manifest setup, API parallelism, rate limits, failure handling, QC sampling, and cost math for 2026.