Captioning for TikTok and Instagram: The 2026 Creator Playbook
Summarize this article with:
The Short-Form Reality
If your captions are not burned into the pixels, a significant portion of your audience never reads them. Neither TikTok nor Instagram Reels accepts a sidecar subtitle file for creator posts: your only reliable options are burned-in captions or each platform's native in-app tool. This post covers which to choose, exactly where to place captions so they survive the platform UI, and a workflow that takes under 15 minutes per video.
The case for captions is not simply that "everyone watches on mute." That claim is technically from Facebook's ecosystem, not TikTok or Reels specifically, and the reality is more nuanced. Even viewers watching with sound on read captions: they keep people anchored when attention drifts, they make fast or accented speech easier to follow, and they are the only thing a deaf or hard-of-hearing viewer has. Third-party analyses consistently show 12-40% watch time increases for captioned short-form content versus uncaptioned equivalents. That range is wide because the effect depends on niche, audio clarity, and how well the captions are timed. But the direction is consistent across sources.
The bigger practical reason to burn captions in: a video is downloaded and reposted, shared to Stories, exported to a DM, or posted on another platform constantly. Native captions disappear the moment the video leaves its original context. Burned-in captions go everywhere.
Native Tools vs Burned-In: The Actual Trade-Off
Both TikTok and Instagram now offer built-in auto-caption tools. TikTok's tool generates captions automatically on upload and lets you edit them before posting. Instagram's version is similar, applied as a sticker in the Reels editor.
The native tools have three real limitations:
Accuracy. TikTok's speech recognition hits roughly 80-90% for clear standard English. That drops with accents, background music, fast speech, or technical vocabulary. You must review and edit before publishing; uncorrected auto-captions damage credibility fast.
Customization. Font choices are limited, you cannot control exact positioning, and the platform can reflow caption placement when it updates its UI.
Portability. Native captions exist only on that platform. Cross-posters should always burn captions in externally so the video carries them wherever it goes.
For casual, one-platform creators posting once or twice a week, the native tool is fine. For anyone publishing across TikTok and Instagram simultaneously, or anyone who cares about font and animation consistency, burned-in is the correct default.
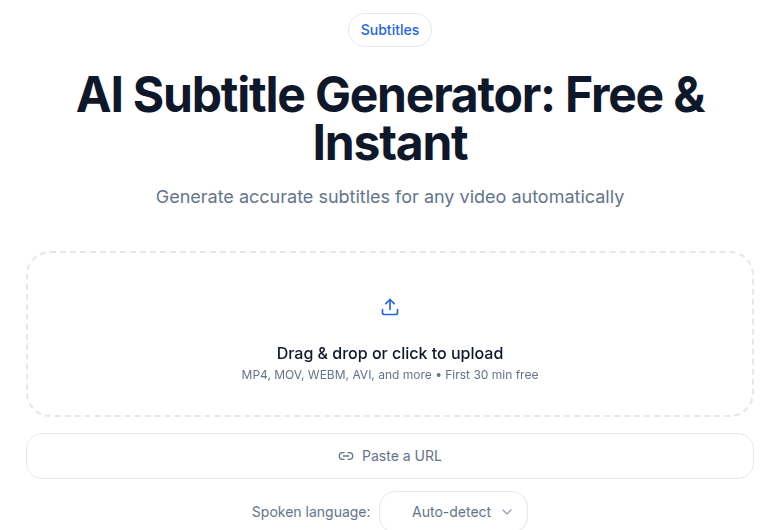 CATT subtitle generator exporting an SRT file for a short-form video
Platform Safe Zones in 2026
This is the part most tutorials get wrong. Each platform's UI overlays specific regions of the frame. Captions placed in those regions get partially or fully blocked. The measurements below are approximate for 1080x1920 source video and reflect the current app UI; they shift with app updates and vary slightly by device, so always preview in the actual app before finalizing.
| Platform | Top dead zone | Bottom dead zone | Right dead zone | Safe horizontal band |
|---|---|---|---|---|
| TikTok (feed) | ~130-230 px | ~320-480 px | ~120 px | ~900 px wide centered |
| Instagram Reels | ~150-210 px | ~310-420 px | ~84-100 px | ~996 px wide centered |
| Instagram Stories | ~250 px | ~250-340 px (organic / ads) | minimal | ~1080 px wide, keep clear of top+bottom |
| Instagram Feed (square, 1080x1080) | ~80 px | ~130 px | minimal | ~1000 px wide |
The universal safe band for anyone cross-posting: design within a central 900x1400 pixel rectangle. That clears the danger zones on all major platforms simultaneously.
For caption placement within the safe band, the position that tests well across most talking-head content is 65-70% of frame height from the top. This puts the text below the speaker's chin but above the UI buttons at the bottom. For B-roll-heavy content, 60% works better because it leaves visual breathing room below.
TikTok specifics
The right-side icon stack (like, comment, share, audio) sits roughly from y=900 to y=1800, covering about 120 pixels of width. Captions anchored to the right side of the frame risk colliding with it. Center-align your captions horizontally and check the final render on the app, not just in your desktop editor.
Instagram Reels specifics
The UI covers more of the top than TikTok does, around 150-210 pixels for the Reels header, profile bar, and battery/time overlay. The bottom dead zone is similarly sized. Instagram's safe zone guide recommends keeping critical text inside the central 70-80% of the frame width to avoid the right-side engagement icons.
Stories specifics
Organic Stories have a ~250 pixel dead zone top and bottom. Ad placements add a reply bar and CTA that push the bottom dead zone to around 340 pixels. For captioned Stories, keep text between y=270 and y=1600 to be safe across both organic and ad contexts.
Workflow: From Audio to Burned-In Captions
My take: the whole pipeline sounds slower than it is once you have a preset. Here is the version that works at volume:
Step 1: Generate the SRT. Export the video or just the audio track and run it through a transcription tool. The subtitle generator returns SRT under five minutes for a 60-90 second clip. If you are working with longer raw footage, the video-to-text tool handles video files directly.
Step 2: Review the transcript. Fix any misheard words, especially names, product terms, or anything technical. Incorrect captions on screen hurt credibility more than no captions.
Step 3: Adjust line breaks. Each caption block should be one or two lines. Keep each line at roughly 32-40 characters. Walls of text stop being readable at short-form scroll speed.
Step 4: Import into your caption editor. CapCut, Premiere Pro, and DaVinci Resolve all import SRT cleanly. Apply your saved style preset (font, color, background box, animation). CapCut's "Apply to All" button pushes the style to every caption block at once.
Step 5: Burn and export. Export with captions rendered into the video frames, not as a sidecar file. This is the default export in CapCut for TikTok/Reels content.
Step 6: Preview on your phone in the app. Watch it muted, looking only at the captions. If you can follow the content from captions alone, they are working. If you squint, the font is too small. If the caption touches a button, move it up.
For a 60-second video, this pipeline runs 10-15 minutes after the rough edit. With a preset saved, subsequent videos drop to 5-7 minutes each.
Font, Size, and Color
Font size for a 1080x1920 source: 48-70 pixels depending on style. Under 48 pixels reads fine on a desktop monitor but becomes a squinting exercise on a 5.5-inch phone. Over 72 pixels crowds the safe zone.
Bold weight (700) is the standard for short-form. Regular-weight text disappears against motion video backgrounds.
Fonts that hold up at short-form scroll speed:
- Inter for modern and neutral. Narrow letterforms fit more characters per line.
- Montserrat for bold brand presence. Slightly thicker strokes than Inter.
- DM Sans for a condensed look that fits long words without line-breaking awkwardly.
- Noto Sans for non-English content. Script coverage is the widest of any free font.
Avoid script fonts and serifs. They look distinctive in previews and unreadable in motion.
Color: White text on a black background box at 70-80% opacity is the safe default. The box gives consistent contrast regardless of what is moving behind the text. White with a black outline only (no box) works on simple or dark backgrounds but fails when the video has busy motion or bright colors.
Accent colors for emphasis (a single keyword in yellow or a brand color, the rest in white) can work well if used sparingly. Overuse creates a strobing effect that actually hurts retention.
Animated Captions: What Still Works
Karaoke-style word-by-word captions (each word highlights as it is spoken) remain the highest-performing caption style for short-form as of mid-2026. The format keeps viewers tracking the audio visually even when attention wanders. Tools like CapCut, Submagic, and OpusClip have presets for this; you import your SRT and they apply word-level timing on top.
The word-by-word style has matured past its early-2024 viral form. The 2024 version was aggressive: yellow highlights, bold pops, every word animating independently. The current version is subtler: a slight scale change (3-5%) or color shift on the highlighted word, with the surrounding words still visible in lower contrast. This reads as polished rather than dated.
For tutorial or B-roll-heavy content where the visual frame matters as much as the speech, a static block caption (two lines, no animation) often performs better. The animation competes with the visuals. Test both against your specific content type.
Translation for Multi-Market Publishing
If you publish to more than one language market, your caption workflow already has the internationalization layer built in. Generate the source-language SRT, translate it, and burn a separate version per language. The video pixels (faces, B-roll, demonstration) work universally; only the caption layer changes.
This scales to multiple markets with marginal incremental work per language once the workflow is set up. For SRT generation and the source transcript, ConvertAudioToText's subtitle generator handles 99 languages. For the broader accessibility angle on captioned content, making videos accessible with captions covers the standards side.
Common Mistakes
Three mistakes appear constantly in feed scrolls:
Captions too low. Placed below y=1500 on TikTok, they land behind the username, song title, and progress bar. Always test on the actual app.
Font too small. Readable on your desktop editor, illegible on a 5.5-inch phone at arm's length. If in doubt, size up.
No background contrast. White text over white sky or a bright background is invisible. The background box or outline is not optional for general content.
One more: not reviewing auto-captions before posting. Both TikTok and Instagram's native tools will mis-transcribe. Uncorrected captions undermine the professional impression short-form creators work hard to build.
For the broader context on when captions become subtitles and when they become something else entirely, transcription vs captioning vs subtitles is worth a read before you commit to a workflow. And if accessibility compliance is part of your publishing requirements, make videos accessible with captions covers the standards that apply to social content.
FAQ
Do TikTok and Instagram accept uploaded SRT subtitle files?
Neither platform accepts a sidecar subtitle file for TikTok posts or Instagram Reels. You have two options: burn captions into the video pixels before uploading, or use each platform's native in-app caption tool after uploading. Burned-in captions are permanent and survive cross-posting; native captions stay on that one platform only.
What are the safe zones for captions on TikTok in 2026?
On a 1080x1920 canvas, TikTok's UI covers roughly the top 130-230 pixels (For You toggle, profile icon), the bottom 320-480 pixels (username, caption, audio name, progress bar), and about 120 pixels on the right edge (like, comment, share stack). A safe central band of approximately 900x1400 pixels covers most devices. Exact measurements shift with app updates and device size, so always preview on the actual app before publishing.
Should I use TikTok or Instagram's native auto-captions or burn them in myself?
Native auto-captions are fast but have real limits: accuracy is roughly 80-90% for clear English audio and drops with accents or background noise, customization is minimal, and the captions only exist on that platform. Burned-in captions survive everywhere the video goes, look exactly as you designed them, and can be styled and animated before export. For creators who cross-post or care about brand consistency, burning captions in is the better default.
How long does a caption workflow take for a short-form video?
For a 60-90 second video with a pre-built style preset, the full pipeline (generate SRT, review timing, style, burn, export) typically takes 10-15 minutes. Once your preset is locked in and you know the safe zones for your main platform, subsequent videos get closer to 5-7 minutes each.
Sources
- TikTok Auto Captions Newsroom Announcement
- Postplanify: Social Media Safe Zones 2026 Complete Guide
- Kreatli: TikTok Safe Zone Guide
- Kreatli: Instagram Reels Safe Zone Guide
- OpusClip: TikTok Caption Best Practices 2026
- BlitzCut: Auto vs Manual vs Burned-In Captions for TikTok
- TryMyPost: Instagram Reels Safe Zones Text Placement 2026
- Sprout Social: Social Media Video Statistics 2026
- Instagram Help: Manage Reels Captions
Try transcription free
Convert any audio or video to clean, unwatermarked text — speaker labels, timestamps, and AI summaries included. First 30 minutes free, no account.
Related Articles
Accessibility Captions and ADA Compliance: A 2026 Guide
How to caption video for ADA compliance: the real WCAG levels, the DOJ Title II deadlines after the 2026 extension, Section 508, the EU Accessibility Act, and the AI-plus-human workflow that actually
How to Transcribe an Instagram Reel: Fast Creator Workflow
Step-by-step guide to transcribing Instagram Reels: paste the URL, download the video, extract a clean SRT, and repurpose captions across TikTok, Shorts, and blog posts.