
Transcription for YouTubers: The Full Creator Loop
Summarize this article with:
The YouTuber Loop
Transcription sits at the center of every repeatable YouTube workflow: you record once, then that single audio track powers your captions, your chapter markers, your blog post, your Shorts clips, and your show notes. Without a clean transcript, each of those outputs requires separate manual work. With one, they cascade. This post walks through that loop step by step, with the tooling decisions that affect quality at each stage.
Why YouTube's Auto-Captions Are Not Enough
YouTube generates automatic captions on most uploads, and for casual viewing they hold up fine. But they break down in three specific ways that matter for creators who publish consistently.
Accuracy varies more than YouTube's headline numbers suggest. The 85-95% accuracy range you see cited depends heavily on your audio setup, accent, and pacing. For technical channels, niche vocabulary, or any non-native English speaker, the lower end of that range is common. At 85% accuracy on a 5,000-word video, you have roughly 750 words that need correction before the transcript is publishable.
You cannot export a clean plain-text file. YouTube's caption editor gives you SRT and VTT, but the raw verbatim text it produces has sentence boundaries and punctuation that require heavy cleanup before it works as a blog post or show notes.
Your transcripts are not portable. If your channel goes down, a video gets flagged, or you migrate platforms, the captions stay in YouTube. A standalone transcription step means your transcript lives in your own files.
For a controlled test of what the difference looks like on your specific audio, the most useful thing you can do is run the same file through YouTube's auto-captions and through a Whisper-based tool side by side. The gap on clean studio audio is modest. On room audio or interview recordings, it is substantial.
Step 1: Getting a Clean Source Transcript
Every downstream task, captions, chapters, blog post, Shorts script, depends on the quality of the source transcript. Get this right once and the rest of the workflow is low-friction.
The two variables that matter most are the model and the audio quality. Whisper Large-v3, the model behind most third-party transcription tools, achieves roughly 2.7% word error rate on clean English audio in benchmark conditions (per OpenAI's published evaluations), and around 8% on real-world mixed audio. YouTube's native captions land closer to 5-15% depending on conditions, per independent tests. The gap is largest on technical terminology and proper nouns, exactly the words that matter most for a tutorial or product review channel.
Audio quality matters more than model choice in practice. A dynamic microphone six to twelve inches from your mouth, in a quiet room, with no background music, reduces errors more than switching from one mid-tier model to another. If you have a consistent error pattern on a specific word or brand name, a post-processing find-and-replace on your raw transcript is faster than re-recording.
Your source transcript should be exported in three formats from whatever tool you use: SRT (for captions), VTT (if you need speaker labels or web players), and TXT (for all the repurposing tasks below).
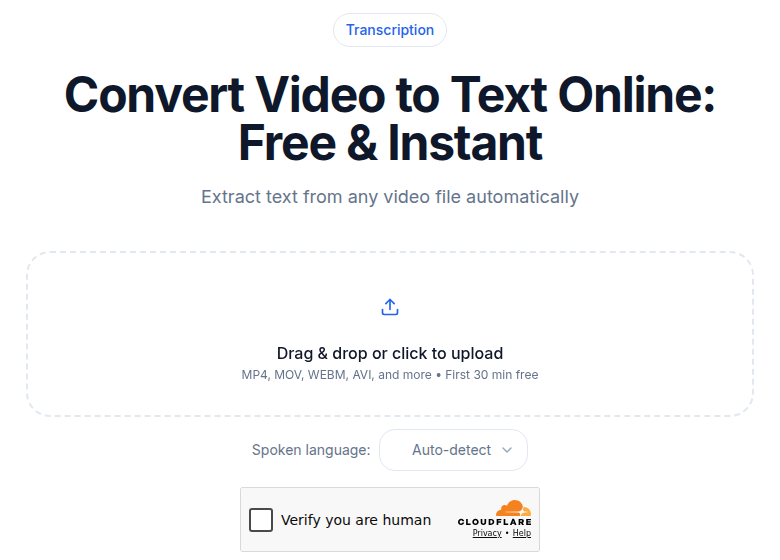 ConvertAudioToText video-to-text tool, showing SRT and VTT export options after transcription
If you record and upload video files rather than audio, a video-to-text tool handles the audio extraction automatically, so you can drop in the MP4 directly.
Step 2: Uploading Better Captions
Once you have a clean SRT, uploading it to YouTube Studio takes about two minutes. The process: go to YouTube Studio, select the video, click Subtitles, then "Add Language" and upload your SRT file.
Uploaded captions are indexed more reliably than auto-generated ones. YouTube's documentation does not quantify the ranking impact, but the mechanism is clear: uploaded captions are treated as authoritative metadata, while auto-captions are marked as machine-generated. For SEO-conscious creators, the upload step is worth the time.
A few formatting details that trip people up:
- The SRT timing format is
HH:MM:SS,mmm --> HH:MM:SS,mmm. Tools that produce millisecond-level timestamps will not cause problems; tools that round to whole seconds sometimes produce visible subtitle jumping on fast speech. - YouTube accepts SRT and SBV. VTT also works but occasionally loses formatting on import. SRT is the safer default.
- For Shorts specifically, burned-in captions (baked into the video file) outperform uploaded caption files, because the Shorts player does not always display uploaded captions in the feed view.
For creators targeting multiple languages, the pipeline extends naturally: clean English SRT, run it through DeepL or a similar translation tool, review proper nouns, and upload the translated SRT as an additional language track. Whisper Large-v3 also supports direct transcription from 99 languages, so if you record in Spanish or French, transcribing the native audio gives a cleaner result than going through an English translation chain. See the subtitle generator for producing multi-language SRTs from a single upload.
Step 3: Adding Chapter Markers from the Transcript
YouTube chapters are one of the most direct SEO levers available to creators. Each chapter title is indexed separately, meaning a well-chaptered video can appear in search results for multiple different queries.
The manual chapter requirements from YouTube are straightforward: the first timestamp must be 0:00, you need at least three total, and each section must be at least 10 seconds long. YouTube does auto-generate chapters on eligible videos, but auto-generated titles tend toward generic labels that miss keyword opportunities.
The workflow with a transcript:
- Get the TXT export with timestamps.
- Read through and mark the natural topic breaks.
- Write chapter titles that use the search terms your audience actually types, not your internal section names.
- Paste the timestamp list into the video description, below your opening hook and keyword sentence.
One practical note: YouTube displays the first 200 characters of your description in search results, so keep those for your main keyword and value proposition. The chapter list goes below that.
A 25-minute tutorial video typically has 6 to 10 natural chapters. Getting those titles right takes about 10 minutes and produces a chapter structure that stays in place as long as the video does. That ratio is hard to beat.
Step 4: Repurposing Into Shorts and Blog Posts
The transcript is the lever that makes repurposing fast rather than time-consuming.
For Shorts: YouTube extended the maximum Shorts length to 3 minutes in October 2024, with the 9:16 vertical format at 1080x1920 remaining the standard. The best-performing Shorts still tend to run 30 to 60 seconds based on completion rate data, so you're looking for the densest 60-second moment in your video, not a three-minute clip.
The transcript-based clip-finding workflow:
- Open the TXT export with timestamps in any text editor.
- Use Cmd-F (or Ctrl-F) to find your strongest claims, surprises, or punchlines.
- Note the timestamps around that section from the SRT.
- Cut the clip in your editor, add burned-in captions from the SRT segment, export vertical.
This replaces 20 minutes of scrubbing video with about 5 minutes of reading. For creators publishing multiple Shorts per week, that adds up.
For blog posts: a 25-minute video contains roughly 4,000 to 5,000 spoken words. Cleaned and restructured around the chapter headings you already created, that is a publishable long-form post. The structure is straightforward: embed the original YouTube video at the top, use the chapter titles as H2 headings, and clean the transcript prose under each one. Publishing the video embed alongside the text means Google can index both.
This matters for transcription for content creators who want search traffic from Google in addition to YouTube. The video might surface on YouTube for a specific search; the blog post can surface on Google for the same or a related query. Two distribution channels from one recording session.
Tool Comparison
The right tool depends on your volume and whether you need an editor alongside the transcript.
| Tool | Type | Monthly cost (billed monthly) | Best for |
|---|---|---|---|
| YouTube auto-captions | Built-in | $0 | Casual channels, no blog repurposing |
| ConvertAudioToText | Transcript-first | $14.99 (Pro, unlimited) | Solo creators who publish transcripts and need SRT/VTT |
| Descript Hobbyist | Editor plus transcript | $24 (10 hrs/month) | Light editing, basic repurposing |
| Descript Creator | Editor plus transcript | $35 (30 hrs/month) | Heavy repurposing, podcast crossover |
| Rev AI | Transcript-first | $29.99 (5,000 mins/month) | High-volume English and Spanish |
| Human transcription (Rev) | Human | Metered, per-minute pricing | Final masters, legal, accessibility compliance |
My take: Descript makes sense if you want the transcript linked to a video timeline for in-app clip editing. If you already have a video editor and just need the clean SRT plus a text file, paying for the editing wrapper is waste. A dedicated transcription tool at $10 to $15 a month is enough for the YouTube workflow described here.
If you are just starting out and want to try the pipeline before committing, ConvertAudioToText lets you run a file through without a sign-up, so you can see what the output looks like on your specific audio before paying for anything.
Common Mistakes That Waste Time
A few patterns show up repeatedly.
Transcribing the same file twice. Save the SRT, VTT, and TXT exports from every video the moment you transcribe it. Name the files to match the video title. The transcript is the source of truth for every downstream task, and re-transcribing costs both time and money.
Publishing the raw verbatim output. Even at 95% accuracy, a 5,000-word video has 250 word-level errors. A quick skim for obvious mistakes, especially proper nouns, brand names, and numbers, prevents publishing errors that undercut credibility. Ten minutes of review on a 25-minute video is a reasonable ratio.
Using background music during recording. Music is the single biggest driver of transcription errors after accent and mic distance. If you score your videos with background music, record a music-free take for transcription purposes and mix the music in afterward. Most creators doing daily publishing do not bother with this, but for evergreen tutorial content where the transcript will be indexed for years, the clean take is worth it.
Letting chapters drift from the transcript. If you update a video or re-edit it, the timestamp-based chapter list in your description will point to the wrong sections. Decide whether your description or your video edit is canonical and update the other one consistently.
For a deeper look at how to structure the transcript-to-blog workflow for other content types, see transcription workflow for content creators.
FAQ
Do uploaded captions improve YouTube SEO compared to auto-captions?
YouTube's own documentation does not publish a numeric ranking boost, but uploaded captions are treated as authoritative metadata and indexed as part of the video's content. Auto-generated captions are marked as machine-generated and contain more errors, which means they index less reliably on technical or specialized vocabulary. For creators who care about organic search traffic, uploading a corrected SRT is the recommended practice.
What is the best format for YouTube chapter timestamps?
The first timestamp must be 0:00, and you need at least three chapters. Each chapter must be at least 10 seconds long. The format in the description is 0:00 Chapter Title on separate lines, in chronological order. For videos over an hour, use H:MM:SS format. YouTube auto-generates chapters on eligible videos, but manual chapter titles give you control over the keywords that get indexed.
How do I find the best clips for YouTube Shorts from a long video?
Open your timestamped TXT transcript in any text editor and search for your strongest claims, surprising statistics, or punchlines. Note the surrounding timestamps from your SRT file, then cut the clip in your editor. YouTube Shorts can now be up to 3 minutes, but completion rate data suggests 30 to 60 seconds performs best. Burn the captions into the clip rather than relying on uploaded caption files, since the Shorts player does not always render uploaded captions in the feed.
How accurate is Whisper Large-v3 on YouTube-style creator audio?
On clean studio audio, OpenAI's published benchmarks show approximately 2.7% word error rate. On real-world mixed audio including room acoustics, mic variation, and conversational pacing, independent benchmarks put it around 8%. YouTube's auto-captions typically land in the 5-15% range depending on conditions. The practical difference for publishing-quality output is most visible on proper nouns, brand names, and technical vocabulary, where transcription tools with context-aware post-processing outperform raw ASR output.
Sources
- Descript pricing page: https://www.descript.com/pricing (checked 2026-07-02)
- YouTube Video Chapters help: https://support.google.com/youtube/answer/9884579 (checked 2026-07-02)
- YouTube Shorts 3-minute limit: https://support.google.com/youtube/answer/15424877 (checked 2026-07-02)
- Rev pricing: https://www.rev.com/pricing (checked 2026-07-02)
- ConvertAudioToText pricing: https://convertaudiototext.com/pricing (checked 2026-07-02)
- Whisper Large-v3 WER benchmarks: OpenAI Whisper paper + vexascribe.com/how-accurate-is-whisper (checked 2026-07-02)
- YouTube Shorts best practices 2026: opus.pro/blog/youtube-shorts-caption-subtitle-best-practices (checked 2026-07-02)
Try transcription free
Convert any audio or video to clean, unwatermarked text — speaker labels, timestamps, and AI summaries included. First 30 minutes free, no account.
Related Articles
How to Transcribe a YouTube Video to Text
Turn any YouTube video into text. Paste the URL into CATT, review the auto transcript, and export TXT, SRT, or VTT subtitles in a few very easy steps.
The Weekly Transcription Workflow for Content Creators (2026)
A concrete weekly transcription workflow for content creators: folder structure, batch cadence, reusable prompts, and time math for podcasters and video creators.