The Weekly Transcription Workflow for Content Creators (2026)
Summarize this article with:
One recording, handled once per week, can produce five publication-ready outputs: show notes, subtitles, social posts, a newsletter section, and optionally a blog post. The workflow runs in about two to three hours of active work after the recording exists. This post covers the folder structure, the batch cadence, and the reusable prompt blocks that make the system repeatable week over week without rebuilding from scratch each time.
The System in One Sentence
Run one recording through a fixed weekly sequence, and it produces five publication-ready outputs, in about two to three hours of active work total, without rebuilding the process from scratch each week.
The example throughout this post is a Wednesday-publishing podcast with a video version, but the structure applies to any creator who produces audio or video as the primary content. If you want a map of all the tools in this space rather than the weekly system, the best transcription for content creators post covers that.
Set Up Your Folder Structure Once
The workflow compounds fastest when files never have to be hunted. Before episode one, create this directory:
/podcast/
  /episodes/
    /YYYY-MM-DD-episode-title/
      raw-audio/
      transcript/
      outputs/
        show-notes.md
        subtitles.srt
        social-posts.md
        newsletter-section.md
        blog-post.md (optional)
One folder per episode, named by publish date. Every file that comes out of the workflow lands in outputs/. The transcript goes in transcript/. The raw recording never moves.
This matters because saved prompts reference the same filenames each week. When you paste show-notes.md into next week's newsletter prompt, you are not searching for the file, you are following the same path you followed last week. The folder is part of the system.
Step 0: Capture, Done Right
The quality of everything downstream is set at recording time. Two things actually move the needle:
Per-speaker audio tracks, recorded locally on each participant's device. Platforms like Riverside.fm, SquadCast (now integrated with Descript), and Zencastr do this by default. With separate tracks, speaker attribution in transcription reaches 97% or higher. With a mixed mono track, attribution accuracy for a two-person interview sits at 88 to 95% and degrades as more voices are added. See speaker diarization explained for the technical background.
A clean recording environment. Acoustic treatment reduces the AI's error rate more than mic upgrades do. Echoey rooms produce transcript correction work that eats the time you saved.
If the recording is clean and per-speaker, the rest of the workflow follows predictably.
Step 1: Transcribe the Source
Transcription is the first batch job. Upload the audio and let it run while you do something else.
For a 45-minute podcast, processing typically takes three to five minutes. The output to keep:
- Plain text transcript with speaker labels
- SRT and VTT subtitle files
- Timestamped word-level data for precision quoting
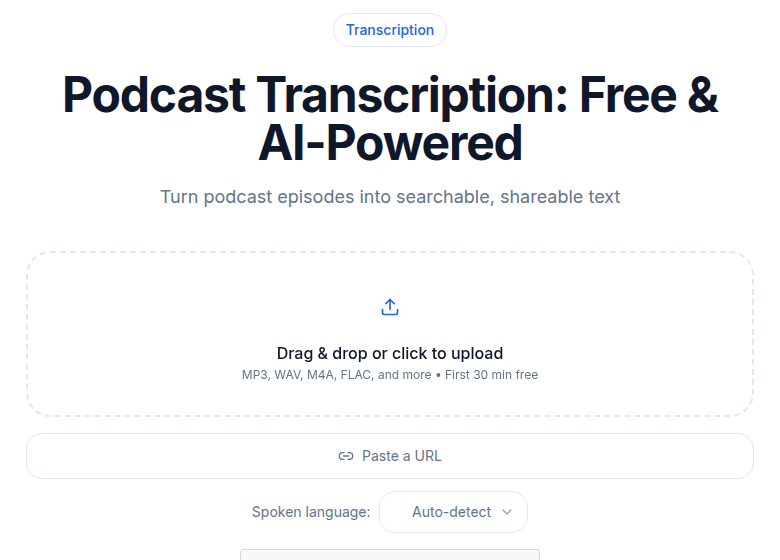 Podcast transcription tool in use, ready to receive audio upload
Review the transcript after it comes back. Budget 10 to 15 minutes per hour of source audio to fix proper nouns, product names, and any obviously misheard segments. Do this correction on the transcript/transcript.txt file in the folder, so downstream steps use the corrected version.
If you just need a clean transcript without a full editing suite, ConvertAudioToText's audio-to-text tool handles podcast audio in 99 languages with speaker diarization. The output is a correctable text file plus SRT and VTT exports.
Step 2: Show Notes or Video Description
The first reusable prompt turns the corrected transcript into show notes. Save this prompt as prompts/show-notes.txt in your system:
You have a corrected podcast transcript with speaker labels.
Produce professional show notes.

Output:
- Two-sentence episode summary (what happened, why it matters)
- Three to five key takeaways as bullet points
- Five to eight verbatim pull quotes with timestamps
- Resources and people mentioned
- Chapter markers formatted as MM:SS Title

Source material tone: [describe your show's style]

Transcript:
[paste corrected transcript]
For YouTube creators, the same output becomes the video description. YouTube generates clickable chapter links from correctly formatted timestamps in the description. The required format is 0:00 Introduction on its own line, with each chapter separated by a line break. Per YouTube's documentation, you need at least three chapters and the first must begin at 0:00.
Chapter titles are also indexed by Google, so write them as descriptive phrases rather than vague labels like "Part 2."
Step 3: Subtitles for the Video Version
If the episode has a video counterpart, the SRT from step one goes directly into the video. For YouTube, uploading your own SRT replaces the auto-generated captions and gives you control over accuracy and formatting. More detail on the SEO side is in transcription for YouTubers.
For TikTok and Instagram Reels, burned captions are the reliable approach. TikTok's caption upload accepts SRT but its auto-caption system frequently overrides the file. Instagram Reels does not display soft subtitle tracks during autoplay at all. The practical method is to burn the text into the video pixels before export using FFmpeg or an app like CapCut. The subtitle generator exports the SRT you need for either path.
For long-form video clips going to multiple platforms, produce one burned version for social and one with a soft track for YouTube.
Step 4: Social Posts from Pull Quotes
The pull quotes from step two are the raw material. Save this prompt:
You have a list of pull quotes from a podcast episode and short
episode context. Convert each pull quote into three social formats:

1. Twitter/X: under 280 characters, hook-first, no hashtags
2. LinkedIn: three to five sentences, professional and specific
3. Instagram caption: two to three sentences, one hashtag maximum

Keep the speaker's exact words. Do not paraphrase into generic claims.
Do not add clickbait phrasing.

Episode context: [two sentences]

Pull quotes:
[paste five to eight quotes from show notes]
A 45-minute episode reliably produces five to eight quotes, which means 15 to 24 social posts in five minutes of generation time plus 10 minutes of review. Save the output to outputs/social-posts.md. A scheduling tool like Buffer or Later pulls from this file during the weekly publishing pass.
The transcription for TikTok creators post has more on platform-specific format choices.
Step 5: Newsletter Section
The show notes go into the newsletter prompt. This integrates into a Substack, Beehiiv, or Ghost send. Save this prompt:
You have show notes from a podcast episode.
Convert them into a newsletter section.

Audience: My existing subscribers, who may or may not have listened.

Structure:
- One-paragraph hook that establishes why this episode matters
  to this reader right now
- Three to five takeaways as a bulleted list
- One pull quote that captures the most distinctive moment
- One closing sentence linking to the full episode

Tone: [your newsletter voice, e.g. "direct, specific, no filler"]

Show notes:
[paste show notes from step 2]
Note on platforms: Beehiiv and Ghost take 0% of subscription revenue. Substack takes 10% of gross subscription revenue. If you are monetizing at the newsletter layer, that 10% cut compounds as the list grows.
Step 6: Long-Form Blog Post (When It's Worth It)
This step is optional and time-gated. It is worth running for high-traffic topics where a 1,500-word post has realistic search upside. It adds 30 to 60 minutes of editing on top of the AI draft. Skip it for purely topical or interview episodes where the SEO case is thin.
You have a podcast transcript on [topic].
Convert it into a 1,500-word blog post.

The post should:
- Open with a specific claim or example from the conversation
- Carry a single clear argument across three to five H2 sections
- Pull direct quotes with speaker attribution and timestamps
- Close with one concrete takeaway, not a recap of what was covered

Style: journalism standard: short paragraphs, named examples,
specific numbers over vague claims.

Transcript:
[paste corrected transcript]
For a broader look at podcast-to-text repurposing, best transcription for podcasts 2026 covers the tool landscape.
Step 7: Schedule and Publish
The final step is distribution. For a Wednesday-publishing podcast:
- Wednesday morning: Podcast goes live with show notes from step two.
- Wednesday afternoon: Newsletter sends with the section from step five.
- Thursday: First social post (lead pull quote from step four).
- Friday: Second social post (different quote, different format).
- Saturday: Long-form blog post, if produced.
- Sunday through Tuesday: Three to four more social posts from the queue.
This stagger gives each piece its own window rather than crowding everything into one day. The scheduling tool reads from outputs/social-posts.md each week; the file path is consistent, so the Zapier zap or Buffer import runs without reconfiguration.
Prompts That Compound (The Actual Template System)
The real compounding is in the saved prompts. A prompt that produces good show notes in week four also works in week forty, if the format stays stable.
Three to save now:
- Show notes prompt matched to your show's tone and section order.
- Social posts prompt tuned to your voice and the platforms you actually post on.
- Newsletter prompt calibrated to your subscribers' expectations.
Each prompt takes 30 minutes to refine across two or three test episodes and then runs at no marginal cost. Across 50 episodes a year, that is the compounding the folder structure enables: same path, same prompts, consistent output.
What Not to Automate
Editorial selection. Which pull quote to lead the newsletter with, which chapter title gets the SEO treatment, which takeaway is provocative enough to be the social hook. The AI produces candidates; the selection is the human job. This is where brand identity lives.
Audience engagement. Comments, replies, community messages. AI can draft, but the actual response should come from a person. Audiences build a pattern-recognition for machine-written engagement fairly quickly.
My take: the creators who get the most out of this system are the ones who use the saved time on selection and engagement rather than on reducing output volume. The point is not to do less but to do more without working longer.
Time Math for a Weekly Creator
For a single-host 45-minute podcast publishing to four channels:
| Task | Time |
|---|---|
| Transcription and review | 30-45 min |
| Show notes generation and review | 20 min |
| Subtitle export for video version | 10 min |
| Social posts generation and review | 20 min |
| Newsletter section generation and review | 15 min |
| Long-form blog post (optional) | 45-60 min |
| Scheduling and publishing | 30 min |
| Total (without blog post) | ~2 hr |
| Total (with blog post) | ~3 hr |
Without the workflow, the same multi-channel output takes 12 to 20 hours per episode, if it happens at all. The transcription step is what makes every other step tractable.
FAQ
How long does the full transcription workflow take per episode?
For a 45-to-60-minute podcast episode, expect 30 to 45 minutes for transcription and review, then another 60 to 90 minutes to generate and review all downstream outputs: show notes, subtitles, social posts, newsletter section. Add 30 to 60 minutes if you also write a long-form blog post. The total AI-assisted production time is two to three hours per episode, compared to 10 to 15 hours of manual work for the same output volume.
Do I need separate recording tracks for good speaker diarization?
Separate tracks make a measurable difference. Tools like Riverside.fm record each participant locally, which removes the AI guesswork and can push attribution accuracy to 97% or higher. With mixed mono audio, diarization accuracy on a two-person podcast is typically 88 to 95%, dropping further as speaker count increases. If you are recording remote interviews, per-speaker tracks are the single biggest accuracy lever.
What should I automate first if I am just starting?
Start with transcription and show notes generation. Running a recording through a transcription tool and then through a saved show notes prompt delivers the highest time saving per hour of effort, replacing 60 to 90 minutes of manual note-writing with 15 to 20 minutes of transcript review plus a five-minute prompt run. Add subtitle generation for the video version second. Layer in social and newsletter automation only after the first two steps are stable.
How do burned captions for TikTok and Reels differ from uploaded SRT files?
For TikTok, SRT upload is supported but TikTok's auto-caption system often overrides it, and display is inconsistent. For Instagram Reels, soft subtitle tracks are not shown during autoplay at all. Burned captions, where the text is rendered into the video pixels before export, are the only reliable method for both platforms. The subtitle generator exports the SRT you need; a tool like FFmpeg or CapCut then burns the text into the video file.
Sources
- Riverside.fm pricing and multi-track recording features: https://riverside.com/pricing
- SquadCast and Descript integration details: https://www.descript.com/
- Zencastr recording plans: https://zencastr.com/pricing (verified via https://www.podmuse.com/post/best-recording-software-for-podcasts)
- YouTube chapter markers requirements and SEO: https://support.google.com/youtube/answer/9884579
- TikTok and Instagram Reels caption behavior: https://tapescribe.com/blog/srt-vs-vtt-subtitle-format-complete-guide
- Substack revenue model (10% cut): https://substack.com/going-paid
- Beehiiv and Ghost revenue model (0% cut): https://ghost.org/vs/beehiiv/
- Speaker diarization accuracy benchmarks: https://novascribe.ai/compare/best-speaker-diarization-tools
Try transcription free
Convert any audio or video to clean, unwatermarked text — speaker labels, timestamps, and AI summaries included. First 30 minutes free, no account.
Related Articles

Agentic Transcription Systems: Real Patterns for 2026
Agentic transcription goes beyond raw text. Learn the three real agent loops (verify-and-retry, terminology lookup, summary chains) that work in production today.
Batch Transcription for Large Projects: The 2026 Playbook
How to run a 1,000-file batch transcription job without losing your mind: manifest setup, API parallelism, rate limits, failure handling, QC sampling, and cost math for 2026.