
How to Add Subtitles to a Video: 2026 Step-by-Step Guide
Summarize this article with:
Generate a timed caption file (SRT or VTT) with an AI tool, correct errors in any text editor, then either attach the file as a soft track (YouTube, Vimeo) or burn it into the pixels for short-form platforms (TikTok, Instagram Reels). The whole process takes under 20 minutes for most short videos. Burning subtitles is a separate step covered in detail in the burning-subtitles-into-video walkthrough.
Adding subtitles to a video in 2026 comes down to three steps: generate a timed caption file, fix any errors, and attach or burn it depending on where the video will live. The first step used to take hours. AI tools now handle it in minutes. The second step is still on you, but it is quick for clean audio. The third step splits into two paths: a soft track for platforms with subtitle players, or burned-in pixels for social feeds that strip external files.
This guide walks both paths, covers the right file format for each destination, and gives you the exact steps for YouTube, TikTok, and Instagram.
Soft Subtitles vs Burned-In Subtitles
The most important decision is whether your viewer can toggle subtitles on and off.
Soft subtitles (closed captions) live outside the video as a separate text track or file. The player decides whether to show them. On YouTube, viewers see the CC button. On your website's HTML5 video player, you attach a VTT file. Search engines can index the text, which helps with video SEO. If someone downloads the raw MP4, the subtitles are not embedded and will not show in a plain video player.
Burned-in subtitles (hardcoded or open captions) are part of the image itself, written into each frame at export time. They show on every player, every device, every screen recorder. There is no toggle. TikTok, Instagram Reels, and Twitter/X video feeds all autplay muted, and most platforms strip soft caption tracks on upload, so burned-in is the only option that survives the upload reliably.
Some videos need both: a soft SRT uploaded to YouTube for search indexing and accessibility, and a burned-in version exported for social cuts. Render the social version from the same source file with the subtitle layer active, and you are done. The burning subtitles into video post covers the render settings in detail.
Step 1: Generate a Caption File with AI
The fastest 2026 starting point is to upload your video or audio to an AI transcription tool and get an SRT or VTT back in minutes.
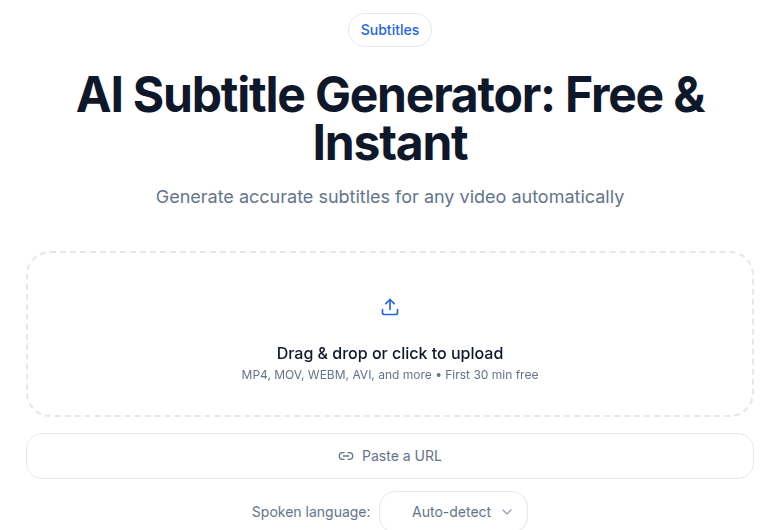
If you just need a clean subtitle file without building a full editing workflow, the subtitle generator at ConvertAudioToText handles this in one step and exports SRT, VTT, or TTML for 99 languages. Paste a YouTube URL or upload a file, pick the spoken language, and download the file.
The practical sequence:
- Upload the video file (MP4, MOV, MKV, WebM all work) or paste a YouTube URL.
- Select the spoken language. For mixed-language recordings, pick the dominant one.
- Choose your output format: SRT for most uses, VTT for HTML5 video on your own site, TTML if a broadcaster asks for it.
- Download the file and open it in any plain text editor.
On clean audio, AI transcription now reaches 95-98% accuracy. On real-world recordings with background noise or strong accents, expect 90-95%. Set aside 10-15 minutes per hour of audio to catch names, jargon, and any misheard words before you publish. For transcription accuracy explained, there is a deeper breakdown of where errors cluster and how to audit efficiently.
Step 2: Edit the SRT File
The SRT format is plain text. Each caption block has a sequence number, start and end timecodes, and one or two lines of text:
1
00:00:00,000 --> 00:00:03,500
The first caption appears here.

2
00:00:03,800 --> 00:00:07,200
The second caption follows.
A few rules that matter for readability:
- Keep lines under 42 characters. This is the Netflix standard and works across all screen sizes, including mobile.
- Each block should stay on screen between 1 and 6 seconds. Shorter disappears before anyone reads it. Longer keeps the screen cluttered while the speaker has moved on.
- Aim for 12-20 characters per second. Above 20 CPS most viewers start skipping words. Fast-talkers may push you to 22-25 CPS for short bursts, but sustained speed above 20 will lose a portion of your audience.
- Break lines at natural pauses (commas, conjunctions, phrase boundaries), not mid-phrase.
For the SRT format itself, UTF-8 encoding is required for YouTube and most platforms. Save with no byte-order mark if you are editing in Windows Notepad. Every other plain text editor handles this automatically.
Step 3a: Attaching Soft Subtitles (YouTube and Web)
For YouTube, upload the SRT directly inside YouTube Studio. Go to your video, open the Subtitles tab in the left menu, click Add Language, select the language, then click Add under the Subtitles column. Choose Upload file, select With timing (your SRT already has timecodes), pick the file, and save.
YouTube processes the file immediately and it is usually live within a minute or two. Your uploaded SRT replaces the platform's own auto-generated captions, which are noticeably less accurate for anything beyond plain English. Uploaded captions are also indexed by Google, which means keywords spoken in your video can drive search traffic. The YouTube auto-captions vs AI tools comparison shows the quality gap on accented speech and technical vocabulary.
For your own website, use VTT instead of SRT. The browser's native track element treats VTT as its native format:
<video>
<track kind="subtitles" src="captions.vtt" srclang="en" label="English" default>
</video>
This gives you toggle controls, language switching, and basic positioning without any JavaScript. For format details, SRT vs VTT subtitle formats covers the differences.
Step 3b: Burning Subtitles Into the Video (TikTok, Instagram, Social)
For TikTok, Instagram Reels, and any short-form platform, the reliable path is to burn the text into the video before you upload. Both platforms have native caption stickers and auto-caption features, which look fine but lock you into the platform's fonts and layout choices. Burned-in captions from your own export give you full control and survive every re-share and cross-post.
The general workflow:
- Import your SRT into a video editor (Premiere Pro, DaVinci Resolve, Final Cut Pro, or CapCut).
- Apply your styling: white text, dark background box, positioned in the lower third with safe-zone margins.
- Export the video with the subtitle track rendered into the image.
My take: for short social clips under 3 minutes, burning in a single SRT track adds less than a minute to export time on any modern machine. The per-platform font size and safe-zone specifics are in the captioning for TikTok and Instagram guide. For the full burn-in process including FFmpeg commands for batch workflows, see burning subtitles into video.
A note on CapCut: auto-caption generation is available in the free tier, but exporting a separate SRT file requires a Pro subscription on desktop. If you need the SRT file itself for further editing, generate it first with a dedicated tool, then import it into CapCut rather than trying to export it back out.
Video Editor Built-Ins: When They Make Sense
Premiere Pro, DaVinci Resolve, Final Cut Pro, and CapCut all ship auto-caption generators in 2026. DaVinci Resolve v21 added AI Animated Subtitles and speaker detection for up to 10 voices. These are useful when you are already editing in the timeline and want captions as a styled text layer you can animate and burn in one pass.
The limitation is accuracy. Built-in captioning is a secondary feature in these apps, not the core product. In practice, the transcript from a dedicated tool tends to need fewer corrections, which saves time on longer content. The hybrid approach works well: generate the SRT externally, import it into your editor as a caption track via File > Import or the Captions panel, then style and render from there. You keep the accuracy and the styling control.
Format Reference: SRT, VTT, TTML
| Format | Best for | Styling | Broadcast-safe |
|---|---|---|---|
| SRT | YouTube, Vimeo, editors, general use | None (text only) | No |
| VTT | HTML5 video on your own site | Basic CSS, speaker labels | No |
| TTML | Broadcast TV, Netflix, OTT delivery | Rich, XML-based | Yes |
If a broadcaster or streaming service sends you a delivery spec, it will almost certainly name one of the TTML profiles (IMSC1 is common). For everything else, SRT is the safe default and VTT handles the web use case cleanly. The SRT vs VTT vs TTML post goes into the mandatory cases for each.
Multi-Language Subtitles
If you need French, Spanish, and Portuguese versions of the same video, translate the SRT file rather than re-transcribing each version from scratch. Translating timed text preserves the timecodes, so the translated captions stay in sync without manual re-timing. The subtitle translation workflow covers the full pipeline for going from one source language to multiple target SRTs.
For YouTube, upload each translated SRT under Add Language for each locale. YouTube will surface the right language to viewers based on their account settings.
FAQ
What is the difference between soft subtitles and burned-in subtitles?
Soft subtitles (closed captions) live as a separate text file or track. Viewers can toggle them on or off, and platforms like YouTube index the text for search. Burned-in subtitles (open captions or hardcoded subs) are baked into the video pixels and always visible regardless of player settings. Use soft tracks for YouTube and Vimeo. Use burned-in for TikTok, Instagram Reels, and any platform that strips external caption files on upload.
Which subtitle file format should I use: SRT, VTT, or TTML?
SRT is the universal default. It has no styling, but every platform and editor accepts it. VTT is the right pick for HTML5 video on your own website, as it is the native format for the browser's track element and supports basic CSS styling and speaker labels. TTML is required for broadcast TV delivery and major streaming services (Netflix, Hulu). For YouTube, Vimeo, and general use, SRT is fine.
How accurate are AI-generated subtitles?
On clean studio audio, current AI transcription tools reach 95-98% accuracy. On real-world recordings with background noise or strong accents, expect 90-95%. Names, technical jargon, and overlapping speakers are where errors cluster. Budget 10-15 minutes of review time per hour of audio, or longer for accented or specialized content.
Do TikTok and Instagram Reels support SRT file uploads?
Sort of. Instagram has an SRT upload field under Advanced Settings during posting, but support is inconsistent across devices and app versions. TikTok's native caption upload accepts SRT, but the display is tied to the platform's own fonts and layout. The reliable approach for both platforms is to burn the subtitles into the video before upload, giving you full control over font, size, position, and styling.
Can I add subtitles directly inside a video editor instead of using a separate tool?
Yes. Premiere Pro, DaVinci Resolve, Final Cut Pro, and CapCut all have auto-caption generators. The quality is generally a step behind dedicated transcription tools because captioning is a side feature in those apps. The practical hybrid: generate an accurate SRT with a dedicated subtitle tool, import it into your editor as a caption track, then style and burn from there. Note that exporting a clean SRT from CapCut requires a paid (Pro) subscription on desktop.
Sources
- YouTube Help: Add subtitles and captions: https://support.google.com/youtube/answer/2734796
- YouTube Help: Supported subtitle and closed caption files: https://support.google.com/youtube/answer/2734698
- Netflix Subtitle Style Guide (via subtitlesedit.com): https://subtitlesedit.com/blog/netflix-subtitle-style-guide-explained
- Subanana: How to Add Subtitles to Instagram Reels (2026): https://subanana.com/en/blog/how-to-add-subtitles-instagram-reels
- GoTranscript: How to Auto-Caption and Export Subtitles in CapCut: https://gotranscript.com/en/blog/add-captions-subtitles-capcut-export-srt
- AssemblyAI: How accurate is speech-to-text in 2026: https://www.assemblyai.com/blog/how-accurate-speech-to-text
- Larry Jordan: Comparing Captioning in Final Cut Pro 11, Premiere Pro 2025, and Resolve 20: https://larryjordan.com/articles/comparing-captioning-in-final-cut-pro-11-premiere-pro-2025-resolve-20/
- W3C: TTML Profiles: https://www.w3.org/AudioVideo/TT/docs/TTML-Profiles.html
Try transcription free
Convert any audio or video to clean, unwatermarked text — speaker labels, timestamps, and AI summaries included. First 10 minutes free, no account.
Related Articles

How to Get Subtitles from Any Video File (2026)
Learn how to extract embedded subtitle tracks from MKV and MP4 files or generate fresh subtitles with AI. Covers FFmpeg, VLC, MKVToolNix, and free online tools.

Burning Subtitles into Video: Settings That Work
Learn when and how to burn subtitles permanently into video for TikTok, Reels, and social media. Covers FFmpeg commands, video editor workflows, styling, and quality tips.