How to Convert Video to Text: Every Method Explained (2026)
Summarize this article with:
Upload your video file or paste a public URL and an AI transcription tool extracts the audio track automatically, then returns a text transcript in one to a few minutes. Resolution and video codec do not affect accuracy: only the audio quality matters. For structured output with timestamps and speaker labels, a dedicated tool beats any platform's built-in captions. YouTube's auto-captions work for quick copy-and-paste but lack punctuation and speaker identification.
Upload the video file or paste a public URL, and a transcription tool strips the audio track and returns a text transcript in one to a few minutes. The video codec and resolution are irrelevant: accuracy depends entirely on the clarity of the recorded audio. Whether you have an MP4 interview, a Zoom cloud recording, or a YouTube lecture, the same basic workflow applies: get the audio to an AI engine, get text back.
This guide covers every reliable method for 2026, including upload-based tools, URL paste, and platform-native captions, with honest notes on where each one falls short.
Why Convert Video to Text
Adding a text version to any video immediately multiplies what you can do with it. Search engines index text, not audio. A 20-minute interview becomes a 2,000-word article. A recorded lecture becomes searchable study notes. A customer testimonial video becomes a pull quote for a landing page.
Other practical reasons:
- Accessibility for deaf and hard-of-hearing viewers
- Translation: text is faster and cheaper to translate than re-dubbing
- Legal and compliance records that need to be searchable
- Research: finding a specific quote in a transcript takes seconds; scrubbing a timeline does not
Method 1: Upload a Video File Directly
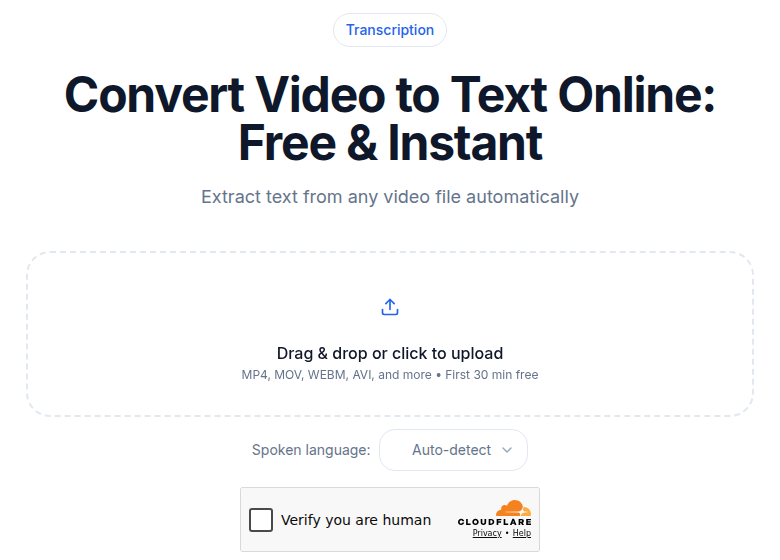
Uploading directly is the fastest path for files already on your device. Drag the file onto the tool, wait for audio extraction and transcription, then copy or download the result.
Accepted Container Formats
All major containers are supported by modern AI transcription tools:
| Container | Common source | Notes |
|---|---|---|
| MP4 | Universal | Broadest compatibility, recommended default |
| MOV | iPhone, Final Cut Pro | Apple container, identical to MP4 for audio extraction purposes |
| MKV | High-quality rips, OBS recordings | May carry multiple audio tracks; tools use the first stereo track by default |
| AVI | Older Windows recordings | Still widely accepted |
| WebM | Browser recordings, YouTube downloads | Open format, well supported |
| FLV | Legacy Flash archives | Accepted, but see the FLV-to-text guide for quirks |
| WMV | Windows Media | Older Microsoft format; see the WMV-to-text guide |
| M4V | iTunes, Apple devices | Accepted when DRM-free |
| 3GP | Mobile feature phones | Supported, low-quality audio common |
For a detailed MP4-specific walkthrough, see the MP4-to-text guide.
What Actually Determines Quality
The tool discards the video frames and works only on the audio. Three things matter:
- Signal-to-noise ratio. Background music, air conditioning, or crowd noise can cut accuracy by 10 to 30 percentage points on a top model.
- Microphone proximity. Lapel or headset mics consistently outperform built-in laptop or camera microphones.
- Overlapping speech. Crosstalk is the hardest case for any AI engine. If speakers take turns, accuracy stays high.
File Size and Free-Tier Limits
Most free tiers set an upload cap. TurboScribe's free plan allows up to 30 minutes per file, three files per day (per vendor documentation). Happy Scribe's free tier provides 10 minutes of transcription. Otter's free plan caps imports at three lifetime file uploads and 30 minutes per conversation. If your file is long, either compress it or use a paid plan. For context on when a paid plan is worth it, see free vs. paid transcription services.
Method 2: Paste a Video URL
If the video is already online, paste the URL directly into a transcription tool instead of downloading the file first. The tool fetches and processes the audio without putting a large file on your device.
Platforms commonly supported include YouTube (public and unlisted), Vimeo (public videos), Loom shared links, Dailymotion, and direct public video URLs ending in .mp4 or .webm.
This method is practical when:
- You are on a phone or tablet with limited storage
- The video is hosted on a platform you do not own
- You need to transcribe multiple URLs in a session without managing downloads
For YouTube specifically, the YouTube transcript generator handles URL paste directly and returns a clean, punctuated transcript with optional timestamps.
Method 3: Platform-Native Captions
Some platforms generate captions automatically. The output is usually less polished than a dedicated transcription tool, but it is available without a third-party upload.
YouTube
YouTube auto-generates captions for most videos in supported languages. To access them on desktop, click the three-dot menu below the video and select "Show transcript." On mobile, expand the description area and tap "Show transcript" if it appears.
Limitations: YouTube's auto-captions omit punctuation, do not identify speakers, and can mis-transcribe technical terminology or accented speech. Independent testing in 2026 puts YouTube auto-caption accuracy at 85 to 95 percent on clean audio (per published benchmarks), which leaves a meaningful correction burden on technical or jargon-heavy content.
Vimeo
Vimeo's automatic captioning is available on all paid plans starting with the Standard tier (per Vimeo's current help documentation). If you do not have a paid Vimeo account, paste the video's public share URL into an external transcription tool.
Loom
Loom includes transcriptions on its free Starter plan (up to 25 recordings, 5-minute limit per video) and on paid Business and Business + AI plans. For recordings longer than 5 minutes on the free tier, you will need to download the file and upload it elsewhere.
Zoom
Zoom's built-in transcription only works for cloud recordings made through Zoom. For local recordings (saved as MP4 on your computer), upload the file directly to a video transcription tool. If you recorded a local session, you may also find an M4A audio file alongside the MP4 in the Zoom folder: uploading the M4A saves time because the file is much smaller and transcription quality is identical. See the full Zoom meeting transcription guide for step-by-step details.
Microsoft Teams and Google Meet
Both platforms offer live transcription during meetings for eligible paid plans. If you have a video file from either platform but no transcript, download it and run it through an upload-based tool.
Choosing the Right Method
| Situation | Best approach |
|---|---|
| File on your device (MP4, MOV, MKV, etc.) | Upload directly to a video-to-text tool |
| YouTube video | Paste URL into a transcription tool or use YouTube's "Show transcript" |
| Zoom local recording | Upload the MP4 or M4A file |
| Vimeo (paid account) | Use Vimeo's built-in captioning |
| Need SRT for subtitles | Use a subtitle-generator tool, not plain transcription |
| Multiple speakers in the video | Look for speaker diarization; see speaker diarization explained |
| 2+ hour recording | Check duration limits; free tiers often cap at 30 to 60 minutes |
Export Formats
Once the transcription is done, the output format depends on what you will do next:
Plain text (.txt): The words, no timestamps. Best for blog posts, articles, or any content you will heavily rewrite.
Timestamped transcript: Text with time codes at speaker turns or regular intervals. Best for meeting notes, podcast show notes, or documents where you need to find specific moments later.
SRT (.srt): Formatted subtitle blocks with sequence numbers and timecodes. Upload directly to YouTube or any video editor to add burned-in captions.
VTT (.vtt): Similar structure to SRT, preferred by HTML5 video players and some web-based editors.
Word document (.docx): Ready for collaborative editing in Word or Google Docs.
If your end goal is a subtitle file, start with a dedicated subtitle generator rather than a plain transcription tool. The timing output is formatted correctly from the start.
Getting the Best Results from Any Tool
Audio quality is the single biggest lever you control. A few practices that consistently improve output:
- Record with a lapel or headset mic rather than a built-in camera mic
- Reduce background noise before recording, not after: air conditioning, music, and open-window ambient noise all introduce errors
- Make sure speakers take turns; overlapping speech is the hardest case for AI models
- Set the correct language if your tool requires it, or use automatic detection for multilingual content
- If your file is very large, compress it to 720p or extract audio to M4A before uploading: transcription quality does not change, but upload time drops sharply
For a deeper look at what causes accuracy to vary, see transcription accuracy explained.
Who This Workflow Fits
Content creators and YouTubers: A 15-minute video becomes a 1,800-word article draft with one upload. Transcription is the fastest way to double content output without doubling production time.
Students and educators: Searchable lecture transcripts cut study time. You can query a text file for a term in seconds; scrubbing a video is not searchable.
Journalists and researchers: Timestamped transcripts let you locate a quote's exact position in the recording for attribution. Every serious interview workflow ends with a transcript.
Legal and medical professionals: AI transcription gets you a serviceable draft quickly, but always review before filing or publishing. Accuracy on clear audio runs at 95 percent or better on top models; that still means one error per 20 words, which is not acceptable without review for high-stakes documents.
Podcasters with video recordings: A single recorded episode can become show notes, a blog post, pull quotes for social, and a captioned YouTube version. The transcript is the multiplier.
If you just need a clean, punctuated transcript without meeting bots or account setup, ConvertAudioToText's video-to-text tool accepts uploads and direct URLs with no login required on the free tier.
FAQ
How long does it take to convert a video to text?
AI tools typically process audio at 5 to 10 times real-time speed. A 10-minute video takes roughly 1 to 2 minutes to transcribe once uploaded. A 60-minute video may take 5 to 10 minutes depending on server load. Upload time adds to this: a compressed 720p file transfers faster than a 4K original, though transcription quality is identical once the audio is extracted.
Does video resolution or codec affect transcription accuracy?
No. Transcription runs entirely on the audio track, not the video frames. A 480p file with a clear microphone will outscore a 4K recording made in a noisy room. If your only goal is a transcript, you can compress the video or extract audio to M4A before uploading to reduce upload time.
Can I transcribe a video in a language other than English?
Yes. Most modern AI transcription tools support dozens of languages, and several support automatic language detection so you do not have to specify the language manually. Accuracy varies by language: well-resourced languages such as Spanish, French, German, and Japanese score near English levels, while lower-resource languages may have higher error rates.
Which video container formats are accepted?
The major containers are universally supported: MP4, MOV, MKV, AVI, WebM, FLV, WMV, M4V, and 3GP. The tool extracts the audio track regardless of container, so the video codec (H.264, H.265, VP9) does not matter. FLV and WMV are older formats that are still accepted but not recommended for new recordings.
Is AI video transcription accurate enough for professional use?
Top models reach a word error rate below 5 percent on clean audio, meaning 95 percent or more of words are correct. Real-world recordings with background noise, heavy accents, or overlapping speakers drop accuracy meaningfully. For legal, medical, or published content, treat the AI output as a high-quality first draft and do a human review pass before finalizing.
Sources
- Rev pricing page (checked 2026-07-02)
- Descript pricing page (checked 2026-07-02)
- TurboScribe pricing (checked via search 2026-07-02)
- Happy Scribe pricing page (checked via search 2026-07-02)
- Otter.ai pricing overview (checked via search 2026-07-02)
- Vimeo auto-captioning help (checked 2026-07-02)
- YouTube Show Transcript help (checked 2026-07-02)
- AssemblyAI accuracy benchmark 2026 (checked 2026-07-02)
- Loom plans documentation (checked via search 2026-07-02)
Try transcription free
Convert any audio or video to clean, unwatermarked text — speaker labels, timestamps, and AI summaries included. First 10 minutes free, no account.
Related Articles
How to Add Subtitles to a Video: 2026 Step-by-Step Guide
Add subtitles to any video in 2026. Covers AI subtitle generation, SRT formatting rules, soft vs burned-in paths, YouTube upload steps, and TikTok/Instagram best practices.

How to Convert AVI to Text: Transcribe Legacy Video Files
Learn how to convert AVI to text, including codec-specific gotchas for DivX, XviD, and VBR MP3 audio, plus when to re-encode first vs upload directly.