
Transcribe From Airplane WiFi: The 2026 Playbook
Summarize this article with:
What Airplane WiFi Can Actually Handle
Whether you can upload an audio file mid-flight now depends entirely on which satellite system your aircraft is running. On Starlink-equipped flights (United, Hawaiian, Qatar, and a growing number of Southwest routes), passengers have recorded upload speeds of 4 to 18 Mbps, well within range for a compressed audio file. On legacy Viasat or Panasonic geostationary systems, uploads often crawl below 1 Mbps, shared across a full cabin. The gap is large enough to change your strategy before you board.
This is the workflow for transcribing in flight: how to identify your system, what to prepare on the ground, what to submit in the air, and when the honest answer is to wait until you land.
Identify Your WiFi System Before You Fly
The first step is not on the plane. Knowing which system your aircraft has tells you how aggressive your pre-flight prep needs to be.
| System | Airlines | Typical upload | In-flight upload strategy |
|---|---|---|---|
| Starlink (LEO) | United, Hawaiian, Qatar, Southwest (rolling out) | 4-18 Mbps | Direct upload works for compressed files |
| Viasat (GEO) | Delta (Sync), American (narrow-body), JetBlue Fly-Fi | Under 1 Mbps | Cloud-stage before boarding |
| Panasonic (GEO) | American (wide-body), many international carriers | 0.5-2 Mbps | Cloud-stage before boarding |
| Gogo ATG | Regional jets, legacy fleets | Near unusable | Wait until landing |
You often cannot confirm the system before boarding, though American Airlines and Delta list the provider on their tech specs pages, and community trackers like unitedstarlinktracker.com show which United tail numbers are equipped. When in doubt, assume the worst and prep accordingly.
A note on airline policies: some carriers throttle or block large uploads regardless of raw speed. Even on a capable system, your plan may cap bandwidth or filter traffic during peak cabin hours. This is not publicly documented by most airlines but has been reported by frequent fliers on Viasat routes.
Pre-Flight Setup (Do This on the Ground)
The work that determines whether in-flight transcription succeeds happens before you board. Three things to do before takeoff.
Compress to 48 kbps Mono
For transcription, audio quality above 64 kbps mono adds no accuracy benefit. At 48 kbps mono, a 60-minute file sits around 22 MB. Accuracy loss compared to 128 kbps is negligible for speech recognition.
ffmpeg -i input.wav -ac 1 -ar 16000 -b:a 48k airplane_version.mp3
If your source is already a compressed MP3, re-encoding adds a small quality hit, but it remains well within transcription-usable range.
Trim Silence from the Edges
Cut leading and trailing silence before compressing. A 3-minute intro chat before an interview starts, or dead air at the end of a recording session, adds megabytes that contribute nothing. Every megabyte not uploaded saves you time and reduces the risk of a mid-upload dropout.
Stage the File in Cloud Storage
This is the highest-leverage move on legacy systems. Upload the compressed file to Google Drive or Dropbox from ground WiFi before you board. Then in flight, instead of uploading from your laptop, submit the cloud-storage URL to the transcription tool. The server downloads from the cloud at server-side speeds. You are only sending a URL over the cabin WiFi.
For Google Drive: set the file to "Anyone with the link can view" and copy the sharing URL. For Dropbox: replace www.dropbox.com with dl.dropboxusercontent.com in the link to get a direct download URL.
A 100 MB file that would take 25 minutes to push from a Viasat seat downloads on the server side in seconds. On sub-1 Mbps upload connections, this is not optional, it is the strategy.
The In-Flight Workflow
Once at altitude and connected:
Step 1: Check Your Connection Before Starting
Open a speed test or load a few pages. If pages load in under 2 seconds and you are on a Starlink-equipped aircraft, direct upload is reasonable for a compressed file under 50 MB. If pages are sluggish or you are on legacy satellite, use the cloud-URL method from Step 2.
Step 2: Submit Via URL (or Upload the Smallest File)
Paste the cloud-storage URL into the transcription tool. If the file is only on your laptop, accept the upload cost. A 22 MB file at 0.8 Mbps takes roughly 4 minutes. Start it, then do something else.
Step 3: Set Language Explicitly
Skip auto-detection. If you know the language, set it directly. The 5 to 10 seconds saved during processing is minor, but it removes one variable on an already constrained connection.
Step 4: Let It Process Server-Side
Once the file is submitted or the URL is accepted, transcription happens on the server. Your connection is not involved. You can close the browser tab, lose WiFi for 20 minutes during a satellite handoff, and come back to a completed result.
Step 5: Download as TXT
A 60-minute transcript in plain text is 30 to 80 KB. That downloads in under a second on any in-flight connection that is functioning at all. Skip JSON or rich formats for the download step.
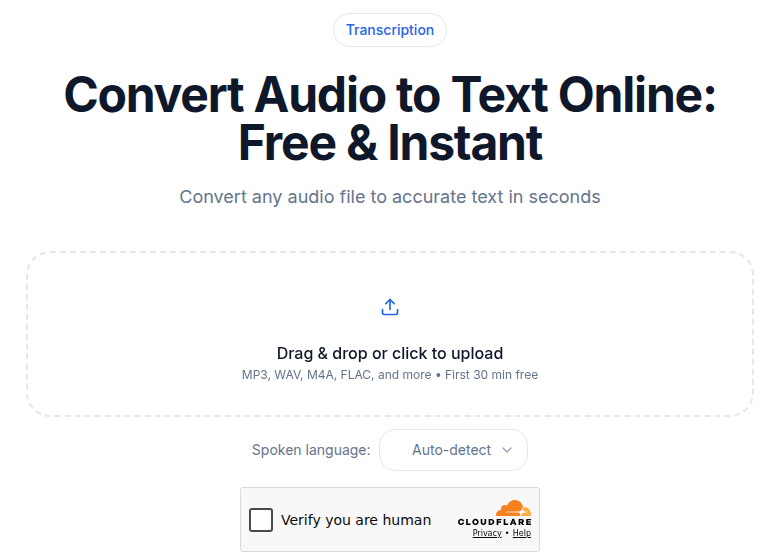 Audio upload tool for in-flight transcription
What Does Not Work In Flight
Live streaming transcription. Real-time WebSocket connections expect low latency, typically under 200 ms. Geostationary satellite systems run 500 to 800 ms round-trip, and Starlink still sits around 40 to 80 ms, which is better but still less reliable than ground connections. Use batch upload, not live streaming.
Multi-file batches submitted at once. On a constrained connection, submitting 10 files simultaneously risks partial failures. Submit one, confirm it is processing, then submit the next.
Files above 100 MB from your laptop. Even on Starlink with 10 Mbps upload, a 200 MB file takes around 3 minutes with no interruptions. Given cabin turbulence, handoffs, and shared bandwidth fluctuations, that is a meaningful risk. Compress first, or stage in cloud storage.
The Offline Option: Local Whisper
If your WiFi is genuinely unusable, or if you are on a route where in-flight internet is not available, the honest alternative is to transcribe locally.
OpenAI's Whisper runs fully offline on your laptop. Tools like Buzz (Windows, macOS, Linux), MacWhisper (macOS), and whisper.cpp make this practical without command-line setup. On Apple Silicon, Whisper Large-v3 runs at roughly 10 to 15 times real-time using the Neural Engine, meaning a 60-minute recording transcribes in 4 to 6 minutes with no upload, no connection, no cloud at all. Windows laptops with a recent GPU (RTX 3060 or better) reach similar speeds.
The trade-off: setup takes 10 to 30 minutes before your flight to download the model weights (2 to 6 GB depending on model size). You will not do this mid-air for the first time. Download and test the tool on the ground. For comparison, see on-device vs cloud transcription for a full breakdown of what you give up and gain.
My take: for one-off in-flight jobs where the WiFi is unreliable, local Whisper is often faster end-to-end than fighting a bad connection. For regular travel workflows, the cloud-URL method on a Viasat seat or direct upload on Starlink is less friction once it is set up.
The Land-and-Upload Pattern
Sometimes the right decision is to skip in-flight transcription entirely. Airport lounge WiFi and hotel connections almost always exceed in-flight speeds, and you will not deal with satellite dropouts or shared-cabin congestion.
If your transcript does not need to exist before you land, do not force it. Stage the compressed file before boarding, keep it in cloud storage, and paste the URL the moment you are on ground WiFi. You get the same transcript with less friction.
For broader advice on transcribing under bandwidth constraints, see transcribing when your internet is slow and the full transcription while traveling guide.
The Routine for Regular Travelers
If you fly for work and regularly need transcripts in the air, the pattern that works:
- Record on the ground (phone, recorder, laptop).
- Compress to 48 kbps mono MP3 before leaving for the airport.
- Upload the compressed file to cloud storage on airport WiFi.
- Board.
- At altitude, paste the cloud-storage URL into ConvertAudioToText (or use direct upload on Starlink-equipped flights).
- Land with the transcript waiting.
Steps 2 and 3 take under 5 minutes once the ffmpeg command is in your clipboard or a script. The in-flight step is a URL paste. For journalists, researchers, or consultants who transcribe frequently, this workflow integrates cleanly into the pre-boarding routine.
For files under the no-signup preview limit, ConvertAudioToText processes without account creation, useful if you are on a shared work laptop or a one-off trip. For ongoing travel workflows, see best no-signup transcription tools for a comparison of what each service offers without registration.
FAQ
Does airline WiFi actually let you upload audio files?
It depends on the system. Starlink-equipped flights (United, Hawaiian, Qatar, Southwest rolling out) allow direct uploads for compressed files in the 20-50 MB range. Legacy geostationary systems (Viasat, Panasonic) typically deliver under 1 Mbps upload, making the cloud-URL method the practical path. Some airlines also throttle or filter large uploads through traffic management policies, regardless of raw speed.
What is the best file format to upload over in-flight WiFi?
48 kbps mono MP3 is the practical sweet spot for transcription over slow connections. A 60-minute recording compresses to roughly 22 MB with no meaningful accuracy loss for speech recognition. Avoid WAV or high-bitrate stereo formats, which can be 10 to 30 times larger with no benefit for transcription quality.
Can I transcribe audio without any internet on a plane?
Yes. OpenAI's Whisper runs fully offline on your laptop. Tools like Buzz or MacWhisper make it accessible without command-line setup. On Apple Silicon, Whisper Large-v3 transcribes at roughly 10 to 15 times real-time using the Neural Engine, so a 60-minute file takes 4 to 6 minutes. You need to download the model weights on the ground first (2 to 6 GB depending on model size).
What should I do if the WiFi drops mid-upload?
If you submitted a cloud-storage URL before the drop, the server continues processing independently and the result will be ready when you reconnect. If you were mid-file-upload, the upload will have failed and you will need to retry. This is the main reason the cloud-URL method is preferred on unreliable connections: after the URL is submitted, your connection is irrelevant to the outcome.
Sources
- Tom's Guide, United Airlines Starlink speed test, 2025: https://www.tomsguide.com/computing/internet/i-just-tried-united-airlines-new-in-flight-wi-fi-powered-by-starlink-and-air-travel-will-never-be-the-same
- Tom's Guide, United Starlink review, 2026: https://www.tomsguide.com/computing/internet/ive-taken-over-300-flights-and-united-just-showed-me-the-first-upgrade-thats-impressed-me-in-years
- The Points Party, Delta WiFi review (Viasat/Intelsat speeds): https://thepointsparty.com/articles/delta-wifi-review
- Ookla via Broadband Breakfast, Starlink in-flight performance: https://broadbandbreakfast.com/ookla-starlink-outpaces-rivals-in-in-flight-wi-fi-performance/
- One Mile at a Time, American Airlines WiFi guide: https://onemileatatime.com/guides/american-airlines-wi-fi/
- One Mile at a Time, Southwest Starlink rollout: https://onemileatatime.com/news/southwest-airlines-starlink-wi-fi/
- Upgraded Points, How airplane WiFi works: https://upgradedpoints.com/travel/airlines/how-airplane-wi-fi-works/
- Local AI Master, Whisper local setup guide 2026: https://localaimaster.com/blog/whisper-local-speech-to-text
- Mictoo, compressing audio for transcription: https://mictoo.com/how-to-compress-audio
Try transcription free
Convert any audio or video to clean, unwatermarked text — speaker labels, timestamps, and AI summaries included. First 30 minutes free, no account.
Related Articles
Transcription While Traveling: The Road Workflow
A realistic road workflow for transcribing field recordings while traveling: phone capture, compress-before-upload, hotel-wifi tactics, and timezone-shifted batch processing.

Spotify Transcript Extractor: How to Copy and Download Episode Text
Get a Spotify podcast transcript you can copy and download: paste a public episode link, 30 minutes free with no signup, TXT or SRT files on eligible plans.