
Transcription Workflow Best Practices: End-to-End Guide 2026
Summarize this article with:
A solid transcription workflow has five stages: capture, prep, transcribe, review, and store. Most wasted time happens at the edit stage, but the root cause is almost always bad capture. Fix the recording first, and the rest of the pipeline compresses. This guide walks each stage with checklists, tool notes, and a concrete podcast example that takes two hours of post-production instead of six.
If you transcribe more than a few files a month, your workflow matters more than your tool choice. The same hour of audio can take five minutes or five hours to process, depending on how you record, prepare, transcribe, review, and store the result. The five-stage discipline below scales from one file to a hundred without falling apart.
Stage 1: Capture
Good capture habits cut review time by 70 percent. Bad capture compounds across every subsequent stage.
Match your rig to your use case
- Solo voice memo. Phone in a quiet room, held about six inches from your mouth.
- In-person interview. Two USB lavalier mics, or a single shotgun mic positioned between speakers. Record on the mic, not the phone, if you have a portable recorder.
- Remote one-on-one. Multi-track recording platform (Riverside, Zencastr, or Descript's built-in remote recorder, which now runs on SquadCast's engine). Each speaker gets their own local audio file.
- Group meeting on Zoom, Meet, or Teams. Local recording with separate participant audio if the platform supports it. Cloud recording as a backup only.
- Lecture or talk. Speaker on a wireless lapel, recorder near the speaker. Audience questions from a room mic are usually unintelligible to a transcription engine.
- Podcast. USB or XLR mics for each host, multi-track recording, headphones to prevent bleed.
The rig you set up once and never revisit is the one you actually use. Pick the setup that fits your most common case and accept minor compromises on the edge cases.
Use a consistent file-naming convention
A folder of files named recording_001.mp3 is a folder you will spend an hour sorting later. Date-first naming is sortable and searchable:
2026-07-01_alice-interview_part-1.mp32026-07-01_team-standup.mp32026-07-01_podcast-ep-47.mp3
Name at capture time, not after the fact. The five seconds it takes saves thirty minutes downstream.
Check supported audio formats for transcription if you are unsure whether your recorder's native format (M4A, FLAC, WAV) will pass through your transcription tool without conversion.
Stage 2: Prep
Prep is what the existing post called the tail end of capture, but it deserves its own stage. Done right, it can halve review time without touching the audio.
Prep checklist
- Normalize volume. One quiet speaker and one loud speaker in the same file means the engine is accuracy-constrained by the quiet one. Bring both tracks to a consistent level before submitting.
- Trim silence at the start and end. Most tools charge by audio duration, and a three-minute pre-roll of room noise costs you money and produces junk.
- Separate tracks when you have them. If you recorded on Riverside or Zencastr, submit each speaker's track separately and let diarization handle the merge. Accuracy on separated tracks is substantially higher than on a mixed file.
- Set the language explicitly. Auto-detect fails on multilingual files and short clips.
- Prepare a vocabulary list. Proper nouns, brand names, and domain terms that the model has never seen. Most tools accept a hint list.
The right audio format at the prep stage matters too. See WAV vs MP3 for transcription for when lossless format actually improves accuracy and when it just wastes upload time.
Stage 3: Transcribe
The transcription run itself. The choices here trade speed against accuracy and cost.
Pick one tool and learn it
Different tools excel at different audio profiles: studio podcast audio, noisy phone calls, multilingual content, compliance-sensitive recordings. For most workflows, picking one tool and learning its options well beats switching between three.
Three options matter most regardless of tool:
- Language. Always specify it.
- Speaker count. If you know how many speakers are on the file, set it. Auto-detection on mixed audio often undercounts.
- Vocabulary boost. A domain-specific word list. The 30 seconds you spend here saves 15 minutes of editing per hour of audio.
Read speaker diarization explained before configuring speaker separation; the difference between "speakers: 2" and "speakers: auto" on a noisy file is significant.
Use batch upload or the API for volume
If you are transcribing more than a few files per week, the web UI is a bottleneck. Most tools expose batch upload (drag multiple files), folder watch (a local folder that auto-uploads), and an API for programmatic submission and result retrieval.
If you just need a clean transcript without a meeting bot or subscription software, ConvertAudioToText accepts direct uploads and returns structured output with no account required on the first run.
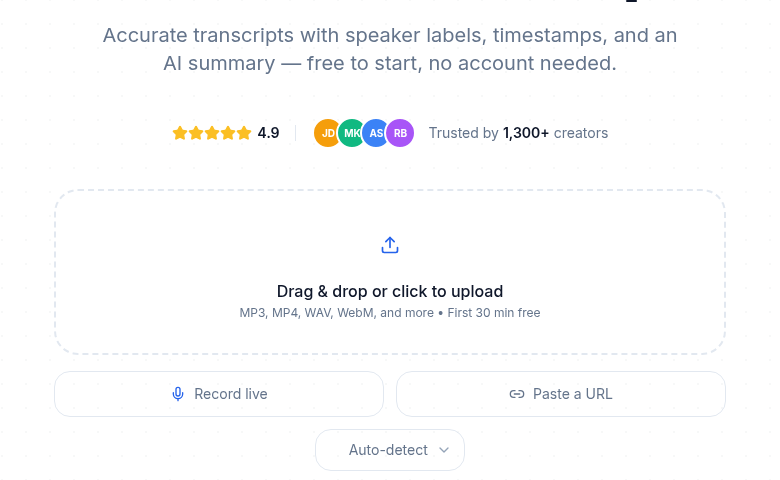 The pipeline in practice: capture, prep, upload, review, store
Set a turnaround expectation
Async processing is normal. A 60-minute audio file through a modern AI engine takes 2-5 minutes, not seconds. Build a waiting step into your workflow rather than treating it as a blocker.
Stage 4: Review
The review pass is where most workflows fall apart. People either edit every "uh" (overkill) or publish with embarrassing errors (underkill).
The 15-minute edit pass
For most use cases, 15 minutes of editing per hour of audio is the sweet spot:
- Open the transcript alongside the audio.
- Play at 1.5x speed.
- Skim the text while listening.
- Pause and fix when:
- A proper noun is wrong (almost always worth correcting).
- A number is wrong and changes meaning.
- A homophone causes confusion.
- A speaker label is wrong for a long stretch.
- Skip:
- Filler-word disagreements, unless you are publishing verbatim.
- Stylistic punctuation preferences that do not change meaning.
- Minor formatting tweaks.
This pass catches the errors that would embarrass you without burning a full hour per file.
Editor features that compound the gains
- Click-to-seek. Click any word to jump the audio to that point.
- Speed control. 1.5x or 2x for review, 0.75x for tricky sections.
- Find and replace. Replace "Jon" with "John" across the entire file in one pass.
- Speaker-label propagation. Rename Speaker 1 to "Alice" once, applies everywhere.
- Keyboard shortcuts. Play and pause without lifting your hands.
If your current editor lacks click-to-seek and speed control, switching editors will recover more time than any other change you can make.
When to skip the review entirely
Not every transcript needs editing:
- Search indexes (the transcript is for retrieval, not reading).
- Internal meeting notes where "good enough" is the standard.
- ML training data (raw volume beats hand-edited precision).
If the transcript goes to an outside audience, review it. If it is a search aid for your own future self, skip it.
For the deeper theory behind accuracy thresholds, see transcription accuracy explained.
Stage 5: Store
The transcript exists. Now pair it durably with its source.
Export the right format for the next step
The right format depends on what comes next. The post on SRT, VTT, TXT, and JSON export formats covers the full decision tree. Quick guide:
| Destination | Format |
|---|---|
| Blog post or article | TXT or DOCX |
| Video subtitle track | SRT (universal) or VTT (web-native) |
| Programmatic processing | JSON |
| Client deliverable | DOCX or PDF |
| Search index | TXT |
Export multiple formats from a single job when your tool allows it. Storage is cheap; re-transcribing is not.
Pair transcript and audio in the same folder
A transcript without its source audio is hard to verify. A paired structure with consistent naming scales:
2026-07-01_alice-interview/
  audio.mp3
  transcript.txt
  transcript.srt
  transcript.json
  notes.md
Cloud storage with a clear hierarchy (Google Drive, Dropbox, S3) lets you find any file in under a minute six months later.
Feed the transcript into a downstream step
For most use cases, the transcript is a stepping stone, not the final deliverable:
- Meeting notes: extract action items, decisions, and attendees. See how to create meeting minutes from audio.
- Interview: pull quotes, themes, and a draft article structure.
- Podcast: generate show notes, chapter markers, and social copy.
- Lecture: produce study notes or flashcard stubs.
Build the downstream step into your workflow from day one, not as an optional extra you bolt on later.
A Concrete Example: Weekly Podcast
Here is a real workflow for a weekly 60-minute podcast:
Monday (recording day):
- Riverside multi-track session with the guest (Pro plan gives 15 hours of separate-track downloads per month, which covers weekly episodes with headroom).
- Each speaker on their own local audio file, exported at 192 kbps MP3.
- File naming:
2026-07-01_ep-47_alice-bob.zipcontaining both tracks.
Tuesday morning (about 60 minutes total):
- Trim and normalize both tracks (5 minutes each).
- Submit both tracks to the transcription tool via API. Sixty minutes of audio takes roughly 4-5 minutes to process.
- Diarization is clean because tracks are separated at the source.
- Receive JSON, SRT, and TXT outputs.
Tuesday afternoon (about 45 minutes total):
- 15-minute edit pass on the TXT for show notes.
- Feed the JSON into an LLM prompt for show notes, chapter markers, and social copy.
- Drop the SRT into the video editor for the YouTube version.
Tuesday evening: publish.
That workflow is roughly 2 hours of post-production for a 60-minute episode. Without the discipline, the same episode takes 6-8 hours. See best transcription tools for podcasts in 2026 for a comparison of tools that fit this pattern.
My take: the biggest productivity lever in this workflow is not the transcription tool, it is the separation of recording tracks. A single mixed file from Zoom with four participants is dramatically harder to transcribe accurately than four separate local recordings. If you can change one thing, change that.
Common Mistakes That Break Workflows
- No recording template. Re-figuring out mic settings before every session.
- Editing every transcript to perfection. Fifteen minutes is enough for most use cases.
- Re-transcribing instead of re-exporting. If you need a different output format, export from the existing job. Do not re-run transcription.
- One folder for everything. Date-first naming and per-project subfolders are non-negotiable at scale.
- Discarding the source audio. If the transcript ever needs verification or reprocessing, you need the original file.
FAQ
How long should the review pass take for a one-hour recording?
Fifteen minutes is the target for a clean recording with one or two speakers. Budget up to 25-30 minutes if the audio is noisy, has more than three speakers, or contains heavy domain-specific vocabulary the transcription engine has not seen. Anything beyond 30 minutes per hour of audio usually means the recording quality needs fixing, not the editing process.
Do I need to convert my audio to WAV before uploading?
Not always. Most AI transcription engines accept MP3, M4A, AAC, and other compressed formats without a quality penalty for typical speech content. WAV provides a measurable benefit only when you are working with very quiet recordings (where compression artifacts interact with low-level speech) or with files that have already been re-encoded multiple times. See WAV vs MP3 for transcription for the full comparison.
What is the difference between speaker diarization and speaker separation?
Speaker diarization labels who spoke when in a single mixed audio file. Speaker separation processes individual single-speaker tracks and merges them with attribution. Separation (recording each person on their own microphone) almost always produces higher accuracy than diarization on a mixed file, especially with more than two speakers or noisy environments. If your recording setup gives you separate tracks, use them.
When should I skip the review pass entirely?
Skip it when the transcript is internal, ephemeral, or machine-consumed: search indexes, rough meeting notes for your own use, and training data for ML models. Review it whenever it goes to a client, gets published, or forms the basis of a quoted article or report.
How should I name and store transcript files for easy retrieval?
Date-first naming with a descriptor is the most durable convention: YYYY-MM-DD_descriptor.ext. Store the transcript alongside its source audio in a project folder, and export at least TXT and your primary format (SRT for video, JSON for programmatic use) from every job. Cloud storage with a predictable folder hierarchy means you can find any file by memory search six months later.
Sources
- Riverside pricing and multi-track features: https://riverside.com/pricing (checked 2026-07-02)
- Descript blog on SquadCast acquisition: https://www.descript.com/blog/article/descript-season-5-squadcast-joins-descript-easy-reliable-remote-recording-editing-in-one-place
- Zencastr overview and multi-track recording: https://zencastr.com/
- Rev transcription best practices: https://www.rev.com/resources/how-to-write-a-transcript-of-audio-or-video-transcription-writing-best-practices
Try transcription free
Convert any audio or video to clean, unwatermarked text — speaker labels, timestamps, and AI summaries included. First 30 minutes free, no account.
Related Articles
How to Transcribe a Google Meet Recording
Turn a Google Meet recording into searchable text, speaker-labeled notes, action items, and subtitles with a clear step-by-step upload or URL workflow.
How to Remove Filler Words from a Transcript
Discover exactly how to remove filler words from a transcript. Follow this practical guide to clean up um, uh, and like for polished, professional, broadcast-ready text.