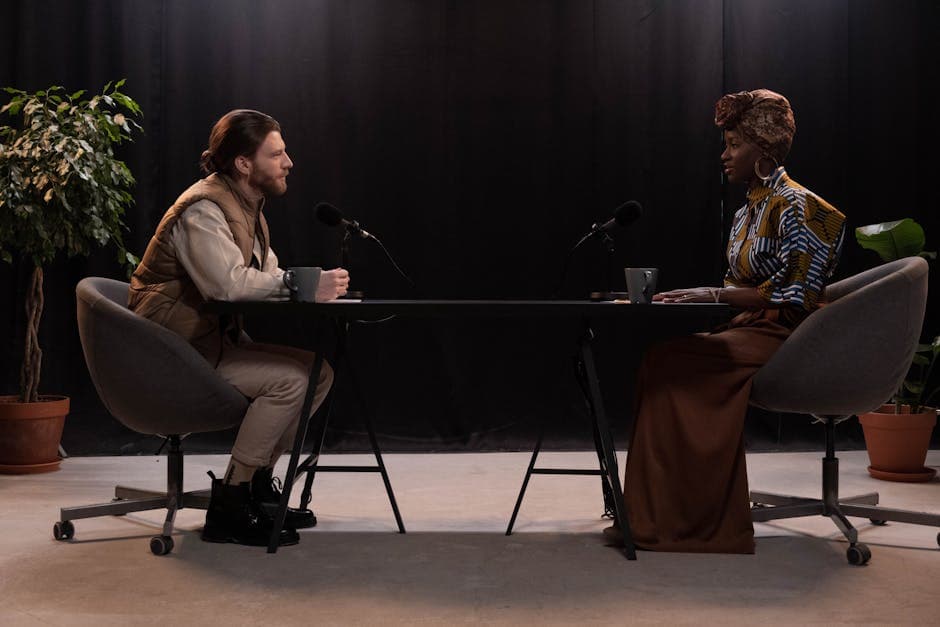
Interview Podcast Workflow: Record, Transcribe, Promote
Summarize this article with:
An interview podcast workflow that holds up at weekly publishing cadence covers six stages: booking, prep, recording, post-production, publishing, and promotion. Remote recording on a platform like Riverside or SquadCast gives you separate per-speaker tracks, which is the foundation for clean transcription with accurate speaker labels. A release form signed at booking protects your editorial rights. The transcript drives the rest: show notes, pull-quotes, clips, and promotion assets. Expect 10 to 18 hours per week total for a solo host.
An interview podcast workflow that can sustain weekly publishing is a six-stage system, not a collection of one-off decisions. The stages are booking, prep, recording, post-production, publishing, and promotion. Hosts who plan each stage explicitly publish more often and with less stress than hosts who improvise three of them.
 Interview transcription with speaker labels is the workflow backbone
The Six Stages at a Glance
- Guest sourcing and outreach. Finding and booking the guest.
- Pre-interview preparation. Research, question development, briefing.
- Recording. The interview itself, on a platform that protects audio quality.
- Post-production. Editing, transcription with speaker labels, show notes.
- Publishing. Upload, episode page, distribution.
- Promotion. Pull-quotes, clips, social posts, guest asset pack.
Each stage feeds the next. Weak preparation produces a weak recording. A weak recording produces a weak transcript. A weak transcript produces weak promotion. The system is only as strong as its slowest stage.
Stage 1: Guest Sourcing and Outreach
The most common failure mode for new interview podcasts is the guest pipeline running dry by episode 12.
A working pipeline has three streams. Inbound requests arrive from guests or their PR teams reaching out to you. For new shows, expect close to zero inbound for the first 25 to 50 episodes. Direct outreach is the bulk of your sourcing for the first year or more. You identify guests and email them. Referrals from past guests eventually become the strongest stream, but only after your show has 20 to 50 published episodes.
Your outreach template determines whether you get responses. Three things separate templates that convert from templates that get ignored:
A specific reason this person. Not "I'd love to have you on." Instead: "Your recent piece on X directly intersects what my audience has been asking about since episode 31 on Y. I'd like to go deeper on the overlap."
A concrete ask. A 45-minute recording on Riverside during a specific week, with three time-slot options included. Make scheduling a one-step decision.
Audience signal and proof. One or two sentences about your listener profile and a recent notable guest. Credibility without overstatement.
Cold outreach response rates run 15 to 35 percent when the template is tight. They run lower for high-profile guests and higher for experts in a tight niche where your audience is exactly their people.
Stage 2: Pre-Interview Preparation
For a 45 to 60 minute interview, plan on two to four hours of preparation. This is the work that separates episodes guests recommend from episodes they tolerate.
Read or watch the guest's recent work from the past year: their book, papers, recent podcast appearances, or published articles. You are looking for what they are thinking about now, not their entire career arc.
Develop 15 to 25 questions. You will not use all of them. Having more than enough lets you follow the conversation where it naturally goes without losing your footing.
Identify at least two moments where you push back. A question where you disagree, probe for a specific example, or surface a counter-argument. These moments produce the quotes your listeners repeat.
Send the guest a short brief 24 hours ahead. Format, approximate topics, any logistics. It sets expectations and helps quieter guests show up more prepared.
Sign the guest release form before this stage closes. The release establishes that you retain full editorial control over the recorded episode, clips, and promotional quotes. Guests waive the right to review or approve the final product. An email where the guest writes "I agree" in reply to a message containing your release language is legally adequate for most shows. Handling this before the conversation removes awkwardness from the post-production stage when you want to pull a sharp guest quote for promotion.
Stage 3: Recording Quality for Interview Shows
Remote recording quality matters more for interview shows than for solo shows, because you cannot control your guest's environment. The platform matters less than the recording architecture.
Use a platform that records each participant's audio locally on their device: Riverside, SquadCast, or Zencastr all do this. Local recording means a dropped internet connection on either end does not corrupt the file. You get separate per-speaker tracks: one clean file for your voice, one clean file for your guest. This separation is what allows your editor and your transcription service to distinguish speakers accurately.
| Platform | Local per-speaker tracks | Built-in transcription | Video option |
|---|---|---|---|
| Riverside | Yes, 24bit/48kHz WAV | Yes (Pro plan) | Up to 4K |
| SquadCast | Yes, progressive upload | No (bundled with Descript) | Yes |
| Zencastr | Yes, 16bit/48kHz WAV | Yes | Up to 4K |
Zoom audio is acceptable for casual recording but is compressed mono by default. If your guest insists on Zoom, enable "original sound" in Zoom audio settings and ask them to wear headphones. For see how to transcribe the result, the how to transcribe a podcast episode guide covers the base mechanics.
Ask your guest to use headphones, a quiet room, and a wired connection if possible. A guest on earbuds in a quiet room sounds better than a guest on a USB microphone in a room with an air conditioner. Give them the request in the pre-interview brief, not the day of.
Test audio for two minutes before starting the real conversation. Levels, background noise, and clipping take 120 seconds to identify and fix. Ignoring them costs an hour of post-production cleanup.
See microphone tips for clear transcription for the specific settings that affect transcript accuracy downstream.
Stage 4: Post-Production with Speaker Labels
Post-production is where most interview shows get bottlenecked, and where the transcript changes what is possible.
Edit the audio first, then transcribe. A 60-minute raw conversation usually trims to 45 to 50 minutes of final audio after removing false starts, repeated sections, and content that does not hold up on reflection. Transcribing before editing means transcribing material you will delete.
Upload the edited audio to your transcription service. Enable speaker diarization. On a clean two-speaker recording, modern diarization assigns speaker labels correctly the large majority of the time. The main failure mode is overlapping speech: when host and guest talk at the same time, attribution will be imperfect. This is not a service limitation but a physical one. Good recording practice cuts overlap significantly. See speaker diarization explained for a technical breakdown of how attribution works and where it falls short.
If you just need a clean transcript with accurate speaker labels without a meeting bot or a separate platform subscription, ConvertAudioToText processes 45-minute interview audio in minutes. On a free account, copy your full transcript and download it as TXT for free, or download it as SRT, VTT, DOCX, PDF, or JSON on a paid plan. The free plan runs your first file on the premium engine with speaker labels, then keeps transcribing free: up to 30 files a day, up to 30 minutes each. The Pro plan at $14.99/month covers unlimited audio with file exports.
Use the transcript to identify pull-quotes before writing show notes. The labeled transcript makes this fast: scan the guest's lines specifically, looking for the one-sentence insight, the surprising statistic, or the framing they use that no one else uses. These become:
- The show notes headline or sub-headline
- Two or three social media graphics
- A quote card for the guest to share to their own audience
- The hook for the promotional email
For the full show notes workflow, how to create podcast show notes automatically covers the process in depth.
For selecting and trimming the strongest clips, podcast clips for social media covers clip selection criteria and format decisions.
Total post-production time with AI-assisted tools: two to four hours. Without them: six to ten.
Stage 5: Publishing
Publishing is mechanical but determines whether your transcript does SEO work for you.
Upload audio to your podcast host (Buzzsprout, Transistor, Castos, Captivate, or Podbean are standard). On your episode page, publish the structured show notes and the full transcript. A transcript on the episode page makes the guest's specific words indexable by search engines and accessible to listeners who read rather than listen. It also gives you a permanent reference when you want to pull quotes from old episodes.
If you cross-post to YouTube, the chapter markers and show notes from your podcast workflow carry over directly.
Stage 6: Promotion with Guest Assets
The episode launch is the highest-leverage moment for promotion. Treat it as a launch, not a passive publish.
Day of launch: personal social post announcing the episode, email to the guest with a link and a brief thank-you, direct messages to three to five people who would specifically benefit from this episode.
Days one through seven: release two to four social media clips staggered across platforms. At least one should be text-based, because text posts distribute differently than video on most platforms.
Create a guest asset pack before launch day. A ready-to-use kit the guest can share without effort includes: one pull-quote graphic with their name and your show logo, one audiogram clip (the strongest 60-second segment), and two or three pre-written social captions at different lengths. Guests with their own audience will share what requires no effort. A kit with two files and a copy-paste caption takes 20 minutes to assemble and consistently drives episode discovery from the guest's network.
Send pull-quotes to the guest before publishing, not as approval but as a heads-up. "Here are the quotes I'm using in promotion. Let me know if any are missing context before we go live." This is a relationship practice, not an editorial concession. You hold editorial control under the signed release. The heads-up prevents the awkward situation where a guest discovers a quote pulled from context when their audience tweets it at them.
Days seven to fourteen: newsletter mention. Cross-promotion to relevant communities where your show has credibility.
For the long game on transcript-driven content monetization, monetizing podcast transcripts covers the revenue paths that build on your episode archive.
Time Budget for a Weekly Interview Podcast
| Stage | Estimated time per week |
|---|---|
| Guest sourcing and outreach | 2 to 4 hours |
| Pre-interview prep | 2 to 4 hours |
| Recording (including setup) | 1 to 2 hours |
| Post-production | 2 to 4 hours |
| Publishing | 1 hour |
| Promotion | 2 to 3 hours |
| Total | 10 to 18 hours |
This is a substantial side commitment for a solo host. It is sustainable at the 10 to 12 hour end. At 18 hours, something else in your life gets compressed. The biggest levers for reducing total time are batching (record two episodes per recording session) and AI-assisted post-production (transcription plus show notes drafting in minutes instead of hours).
Hiring a part-time editor typically becomes economical at 1,000 to 5,000 monthly listeners, depending on the show's monetization. Before that threshold, the cost of outsourcing usually exceeds what the show generates.
Three Patterns That Kill Interview Podcast Momentum
Skipping guest preparation. Hosts who show up underprepared produce interviews that are pleasant but forgettable. The questions that make episodes worth recommending come from reading the guest's recent work.
Chasing perfection in editing. Past 90 percent polish, you are spending hours for marginal improvement. Missing the publish date costs more than the hour of cleanup you were chasing.
Treating promotion as optional. A strong episode that nobody discovers is worse than a good episode that many people hear. Budget time for promotion in proportion to what you spend on production.
For context on the transcription layer that connects all of these stages, transcription for podcasters: complete guide covers how transcript workflows connect recording through promotion.
My take: the interview shows I have seen reach 10,000 monthly listeners did not get there on audio quality alone. They built a system that kept them publishing every week while gradually improving. The workflow above is that system. The transcript is its connective tissue.
Frequently Asked Questions
What remote recording platform should I use for interview podcasts?
Riverside, SquadCast, and Zencastr all record each participant's audio locally on their own device and upload separate tracks. That local recording model means a dropped internet connection does not corrupt the file. For most interview podcasters, any of the three works well. SquadCast is bundled free with Descript subscriptions. Zencastr adds hosting and RSS distribution in the same platform. Riverside's Pro plan ($24/month billed annually) includes 4K video and unlimited transcription if video publishing matters to your show.
Does speaker diarization work well for two-person interviews?
On a clean two-person recording, modern diarization assigns speaker labels correctly the large majority of the time. The main failure mode is overlapping speech: when host and guest talk at the same time, both the transcript and the speaker attribution will be imperfect. Good recording practice (pausing before responding, using a quiet room) matters more than which transcription service you choose. See our speaker diarization explained post for a full breakdown.
Do I need a guest release form?
Yes. A release form, signed after booking and before the recording date, establishes that the host retains full editorial control. Guests waive the right to review or approve the final episode, clips, or social media quotes. Without a signed release, a guest can dispute how you edited or promoted their words. A simple email with release language that the guest confirms in writing is legally adequate for most shows.
How long does post-production take per episode?
With AI-assisted transcription and show notes generation, expect two to four hours per episode: roughly one hour of audio editing, five minutes to transcribe and export, and one to two hours for show notes, pull-quote selection, and clip identification. Without AI tools the same work runs six to ten hours. The single biggest time lever is transcription: a 45-minute episode processes in minutes rather than taking hours to type.
When should I hire a podcast editor?
The economics of hiring a part-time editor or producer typically start to work at the 1,000 to 5,000 monthly listener level, depending on how the show is monetized. Before that threshold, the cost of outsourcing often exceeds the revenue the show generates. A useful intermediate step is to batch record two episodes per recording session, which cuts the fixed overhead of setup and scheduling in half without adding headcount.
Sources
- Riverside.fm pricing page
- SquadCast review and pricing, Podcast Pontifications
- Zencastr pricing and features
- Podcast guest release contracts, Entertainment Law Offices of Gordon P. Firemark
- Guest release forms and approval rights, Simplecast
- ConvertAudioToText pricing and plans
- Speaker diarization tools overview, AssemblyAI
Try transcription free
Convert any audio or video to clean, unwatermarked text — speaker labels, timestamps, and AI summaries included. First 30 minutes free, no account.
Related Articles
Medical Transcription for Clinical Notes: A Practical AI Workflow for Clinicians
Learn how clinicians use AI transcription for clinical notes. A practical CATT workflow for audio upload, speaker labels, summaries, and TXT or DOCX export.

Agentic Transcription Systems: Real Patterns for 2026
Agentic transcription goes beyond raw text. Learn the three real agent loops (verify-and-retry, terminology lookup, summary chains) that work in production today.